Author: mamali

  • Aadhaar Authentication in GST Registration: Process, Requirements, Benefits, and Common Issues

    Introduction

    GST registration gives a business a formal identity under the Goods and Services Tax system. But before a GST registration is approved, the system needs to verify important information about the applicant and the people connected with the business.

    One part of this verification is Aadhaar authentication.

    For many applicants, the process is simple. They receive an authentication link, provide consent, enter their Aadhaar details, and complete OTP verification.

    However, not every application follows exactly the same path.

    Some applications can be selected for biometric authentication based on system checks and risk parameters. In such cases, the required person may need to visit a designated GST centre for biometric verification and document-related checks.

    This makes it useful to understand what Aadhaar authentication actually means, who needs to complete it, what happens after submission, and what can cause delays.

    A clear understanding can help applicants avoid common mistakes and complete the registration process with fewer problems.


    What Is Aadhaar Authentication in GST Registration?

    Aadhaar authentication is a process used to verify the identity of an individual through Aadhaar-based authentication.

    During GST registration, the applicant provides details about the business and its responsible persons. Depending on the business structure, the GST system identifies the people who need to complete Aadhaar authentication.

    These people may include:

    • Proprietors
    • Partners
    • Directors
    • Designated partners
    • Members of a managing committee
    • Primary Authorized Signatory
    • Other applicable persons

    The purpose is simple:

    The GST system needs to know that the people connected with the registration application are genuine.

    Aadhaar authentication provides one method of checking this identity.

    It is important to understand that Aadhaar authentication is not the same as GST registration approval. It is one part of the wider registration and verification process.


    Why Is Aadhaar Authentication Used in GST Registration?

    A business registration involves important tax information. The government therefore needs a way to verify the identity of people applying for registration.

    Aadhaar authentication can support this process by connecting the registration application with an identity verification method.

    It can also help reduce problems linked with:

    • Fake identities
    • Incorrect registration details
    • Misuse of another person’s information
    • False business applications
    • Identity mismatches
    • Fraudulent registration activity

    The process also creates a clear verification step for the people responsible for a business.

    However, Aadhaar authentication does not remove the need for other GST checks. PAN validation, business information, documents, and other registration requirements may still be reviewed.


    Who Needs Aadhaar Authentication?

    The people required for authentication depend on the constitution of the business.

    This is one of the most important points for a new GST applicant.

    A sole proprietor does not follow the same authentication pattern as a company. A partnership firm also has different requirements from an LLP.

    Common examples include:

    Proprietorship

    The proprietor and the Primary Authorized Signatory may be selected for authentication.

    Partnership Firm

    One partner and the Primary Authorized Signatory may be selected.

    Hindu Undivided Family

    The Karta and Primary Authorized Signatory may be involved in the authentication process.

    Company

    The Primary Authorized Signatory and one applicable director may be selected.

    Limited Liability Partnership

    One designated partner and the Primary Authorized Signatory may be selected.

    Society, Trust, Club, or Association

    One applicable member and the Primary Authorized Signatory may be selected.

    The exact persons shown in the GST application should always be checked before submission.

    The key point is that not every person connected with a business necessarily has to complete Aadhaar authentication.


    How the GST Registration Process Connects With Aadhaar Authentication

    Aadhaar authentication is not performed before the GST registration application exists.

    It becomes part of the registration process after the applicant enters the required business and personal details.

    A simplified flow looks like this:

    GST registration application → PAN and contact validation → Application submission → GST system checks → Aadhaar authentication or biometric verification → Further registration processing

    The exact path can vary.

    Understanding this sequence helps explain why an applicant may receive an Aadhaar authentication request after submitting the application instead of during the first few steps.


    Step-by-Step Aadhaar Authentication Process

    Step 1: Start GST Registration

    The applicant starts a new registration application on the GST Portal.

    Basic information is entered first.

    This can include:

    • Type of taxpayer
    • State and district
    • Legal business name
    • PAN
    • Email address
    • Mobile number

    The information should match the relevant official records.

    The mobile number and email address are also important because GST registration uses them for OTP and other communication.


    Step 2: Generate the Temporary Reference Number

    After the initial details are entered and validated, the system generates a Temporary Reference Number, commonly called a TRN.

    The TRN allows the applicant to continue the registration application.

    The applicant should keep the TRN safely available until the application is completed.


    Step 3: Complete the Registration Application

    The applicant then enters the remaining information in the registration form.

    Depending on the business, this can include:

    • Business details
    • Promoter or partner details
    • Authorized signatory details
    • Principal place of business
    • Additional business locations
    • Goods and services
    • State-specific information
    • Aadhaar authentication details
    • Verification information

    Accuracy is important at this stage.

    An error in a person’s name or other identity information can create problems later during authentication.


    Step 4: Select the Aadhaar Authentication Option

    The registration form contains an Aadhaar Authentication section.

    The applicant can see the applicable persons who may need authentication.

    The system generally selects the Aadhaar authentication option as Yes by default.

    The applicant then checks the applicable people and continues with the application.

    The names selected should be reviewed carefully before submitting the registration application.


    Step 5: Submit the Registration Application

    After the required information is completed, the applicant submits the registration application.

    The GST system then performs the required validation and risk-based checks.

    At this stage, the application may follow an OTP-based authentication route or a biometric authentication route.

    This is why two applicants may experience slightly different verification processes.


    How OTP-Based Aadhaar Authentication Works

    When OTP-based authentication applies, an authentication link is sent to the registered contact details of the applicable persons.

    The person can open the authentication link and provide consent.

    The process generally involves:

    1. Opening the authentication link.
    2. Giving consent for Aadhaar authentication.
    3. Entering Aadhaar number or Virtual ID.
    4. Receiving the Aadhaar OTP.
    5. Entering the OTP.
    6. Submitting the verification.
    7. Waiting for the authentication result.

    The OTP is linked to the Aadhaar holder’s registered contact details.

    The authentication link has a limited validity period. Therefore, it should not be ignored after receiving it.


    What Is Biometric Aadhaar Authentication?

    Biometric Aadhaar authentication is a more direct identity verification process.

    Instead of completing the entire identity check through an online OTP, the applicable person may need to visit a designated GST centre.

    The process can involve:

    • Biometric authentication
    • Photograph capture
    • Identity verification
    • Document verification
    • In-person verification

    This process is generally connected with applications selected through the GST system’s data analysis and risk parameters.

    It is important to understand that biometric verification does not mean the applicant has done something wrong.

    A risk-based selection is a verification mechanism. It does not by itself mean that the business is fraudulent or that the application contains an error.


    Why Can Some GST Applications Require Biometric Verification?

    The GST system uses different checks during registration.

    Some applications may require additional verification before the registration process can continue.

    Biometric authentication adds another identity check.

    This can help the registration system verify that the person associated with the application is actually the person claiming that identity.

    For the applicant, the practical difference is important.

    With online OTP authentication, the person may complete the required step remotely.

    With biometric authentication, the person may need to plan a visit to the designated centre.


    What Happens If Biometric Authentication Is Required?

    The applicant may need to book a slot at the designated GST centre.

    The applicable person must then visit the centre and complete the required verification.

    Depending on the application, the people selected for biometric authentication may not all have exactly the same verification requirements.

    Applicants should carefully follow the instructions shown on the GST Portal.

    A missed visit can delay the application.

    In certain situations, failure to complete the required biometric or document verification within the allowed period can prevent the Application Reference Number from being generated.

    This is why applicants should check their GST registration status after submission instead of assuming that the application is complete.


    What If You Select No for Aadhaar Authentication?

    Aadhaar authentication is not simply a choice between verification and no verification.

    If an applicant does not opt for Aadhaar authentication, another verification process may apply.

    The applicant may need to provide e-KYC documents and complete photo capture and document verification at a designated GST centre.

    This means selecting No does not remove identity verification.

    It changes the route used for verification.

    This is an important point because some applicants may assume that choosing No will make the process completely online.

    That is not necessarily the case.


    What Is e-KYC in GST Registration?

    e-KYC means electronic Know Your Customer verification.

    In simple terms, it is a way of checking a person’s identity through permitted identity documents and information.

    In applicable cases, a person may use the e-KYC route instead of Aadhaar authentication.

    The documents used must meet the requirements of the GST process.

    The purpose remains the same:

    Verify that the person connected with the GST application is genuine.

    The difference is in the method used for verification.

    Aadhaar authentication uses Aadhaar-based verification, while e-KYC can involve the submission and review of identity documents.


    Aadhaar Authentication and Rule 14A

    Rule 14A is another point that applicants should understand when completing GST registration.

    The GST registration application contains an option related to registration under Rule 14A.

    Under the current GST Portal process, an applicant can select the Rule 14A option when the stated eligibility condition regarding output tax liability is met.

    If the applicant selects Yes for Rule 14A, Aadhaar authentication also needs to be selected as Yes.

    This creates a direct connection between the two choices.

    Therefore, applicants should not select registration options without first understanding their eligibility and the related verification requirements.


    What Happens When Aadhaar Authentication Fails?

    Aadhaar authentication can fail for different reasons.

    One common problem is a mismatch between the name entered in the GST registration application and the name available in Aadhaar records.

    Other possible problems include:

    • Incorrect Aadhaar number
    • Incorrect Virtual ID
    • OTP problems
    • Inactive registered mobile number
    • Expired authentication link
    • Incorrect person selected
    • Technical issues
    • Incomplete verification
    • Document mismatch
    • Biometric verification failure

    The correct solution depends on the reason shown by the GST system.

    The applicant should first identify the exact error instead of repeatedly trying the same step.


    Aadhaar Name Mismatch in GST Registration

    Name mismatch is one of the practical problems that applicants should watch for.

    For example, suppose a person’s official Aadhaar name contains one spelling, while the GST application uses another spelling.

    The GST system may identify the difference.

    This can create a verification issue even when the person is genuine.

    Before submitting the application, check:

    • Full name
    • Spelling
    • Order of names
    • Identity details
    • PAN information
    • Aadhaar information

    The goal is not to make every record identical in appearance when the official records legitimately differ. The goal is to avoid simple data-entry mistakes.


    What Happens If the Aadhaar Authentication Link Expires?

    The authentication link is time-sensitive.

    The GST Portal provides a limited validity period for the link.

    If the person does not complete authentication within that period, the applicant may need to generate or resend the authentication link.

    This is why it is better to complete authentication soon after receiving the message.

    Do not keep the task pending until the last day.

    If the responsible person is travelling or unavailable, the delay can become a practical problem.


    What If the Aadhaar OTP Does Not Arrive?

    An OTP problem can happen for several reasons.

    First, check whether the mobile number and email address linked with Aadhaar are active.

    Then check:

    • Network connection
    • Email inbox
    • Spam or junk folder
    • Correct Aadhaar details
    • Correct authentication page
    • Whether a previous OTP request has expired

    Do not request new OTPs repeatedly without waiting for the required interval.

    If the problem continues, follow the error message and available GST support process.


    Does Successful Aadhaar Authentication Mean GST Registration Is Approved?

    No.

    This is one of the most important things to remember.

    Aadhaar authentication confirms an identity-related part of the registration process.

    GST registration can still involve other checks.

    For example, the application may require validation of:

    • PAN
    • Business details
    • Address
    • Supporting documents
    • Authorized signatory information
    • Other registration conditions

    Therefore:

    Aadhaar authentication completed ≠ GST registration automatically approved.

    The applicant should continue tracking the application until the registration process reaches its final stage.


    Common Mistakes During Aadhaar Authentication

    1. Entering Incorrect Personal Details

    A small spelling error can create a mismatch.

    Better approach: Check important identity details before submission.

    2. Ignoring the Authentication Message

    Some applicants submit the form and stop checking their email or mobile.

    Better approach: Monitor registered communication after submitting the application.

    3. Waiting Too Long

    An authentication link does not remain valid forever.

    Better approach: Complete the process as soon as possible.

    4. Assuming Everything Is Online

    Some applications may require biometric verification.

    Better approach: Be ready to visit the designated GST centre if instructed.

    5. Selecting the Wrong Person

    The business structure determines which people may need authentication.

    Better approach: Review the selected person before submitting the application.

    6. Ignoring the Business Structure

    A company, partnership, LLP, and proprietorship do not follow exactly the same authentication pattern.

    Better approach: Check the requirement based on the actual constitution of the business.

    7. Sharing Aadhaar OTP

    An OTP should not be casually shared with another person.

    Better approach: Complete the authentication through the official process and keep OTPs private.


    Security and Privacy During Aadhaar Authentication

    Aadhaar information is sensitive personal information.

    Applicants should take basic security precautions during the GST registration process.

    Never share an Aadhaar OTP with an unknown person.

    Do not enter Aadhaar details into random websites received through messages or emails.

    Use the official GST registration process.

    Also avoid sending identity documents to people who do not need them.

    If a professional is helping with GST registration, the applicant should still understand what verification is being performed and where the information is being entered.

    The person whose identity is being verified should remain in control of their authentication step.


    Practical Factors That Can Delay GST Registration

    Aadhaar authentication is only one possible source of delay.

    Other problems can include:

    • Incorrect business information
    • PAN mismatch
    • Wrong address details
    • Missing documents
    • Incorrect authorized signatory details
    • Delayed OTP verification
    • Missed biometric appointment
    • Incomplete document verification
    • Technical problems
    • Failure to respond to a GST notice

    This shows why careful preparation matters.

    A correct Aadhaar number alone cannot solve problems caused by incorrect information elsewhere in the application.


    How to Prepare Before Starting GST Registration

    Good preparation can reduce avoidable mistakes.

    Keep the following information ready:

    • PAN details
    • Business legal name
    • Business constitution
    • Proprietor, partner, or director information
    • Authorized signatory details
    • Business address
    • Contact details
    • Bank-related information when applicable
    • Identity documents
    • Address documents
    • Business-related supporting documents

    Also confirm that the people selected for Aadhaar authentication are available to complete their part of the process.

    If biometric verification is required, make sure the relevant person can visit the designated centre within the allowed period.


    A Simple GST Aadhaar Authentication Checklist

    Before submitting the application, check:

    • Business name is correct.
    • PAN information is correct.
    • Business constitution is selected correctly.
    • Authorized signatory details are correct.
    • Applicable promoter, partner, or director is selected correctly.
    • Aadhaar information is correct.
    • Aadhaar-linked contact details are accessible.
    • Required documents are ready.
    • Rule 14A selection has been reviewed where applicable.
    • The applicant understands whether OTP or biometric verification may apply.
    • GST Portal messages will be monitored after submission.

    This simple check can prevent many avoidable errors.


    Aadhaar Authentication: Important Terms

    Aadhaar Authentication

    A process used to verify a person’s identity through Aadhaar-based authentication.

    OTP

    A One-Time Password used to complete electronic verification.

    TRN

    A Temporary Reference Number generated during the GST registration process.

    ARN

    An Application Reference Number associated with a submitted GST application.

    Primary Authorized Signatory

    The person authorized to act on behalf of the taxpayer for GST-related activities.

    e-KYC

    Electronic verification of identity using permitted documents and information.

    Biometric Authentication

    Identity verification using biometric information at a designated location.

    GST Seva Kendra

    A designated centre where certain GST verification activities can be completed.

    VID

    A Virtual Identification Number that can be used in supported Aadhaar authentication processes.

    Rule 14A

    A GST registration provision with specific eligibility and verification conditions.


    How to Avoid Aadhaar Authentication Problems

    There is no single trick that guarantees a smooth registration.

    The better approach is careful preparation.

    Before submission

    Check all names and identity details.

    During submission

    Review the Aadhaar Authentication section carefully.

    After submission

    Monitor email, mobile messages, and the GST Portal.

    If OTP authentication is requested

    Complete it without unnecessary delay.

    If biometric authentication is requested

    Follow the appointment and centre instructions carefully.

    If authentication fails

    Read the exact error and correct the underlying problem.

    If the application is still pending

    Check whether another GST verification step is waiting for action.

    This approach is more useful than repeatedly trying the same failed verification step.


    What Businesses Should Understand About Aadhaar Authentication

    Businesses should not view Aadhaar authentication only as a technical step.

    It is part of a wider identity and registration verification process.

    This matters because a business may have correct documents but still face a delay if the responsible person does not complete the required authentication.

    For companies and partnerships, internal coordination can therefore be important.

    The person responsible for the registration should know:

    • Who needs to authenticate
    • Which method may apply
    • When authentication must be completed
    • What documents may be required
    • Who will visit the GST centre if needed
    • How the application status will be tracked

    A small amount of planning can prevent unnecessary back-and-forth.


    Frequently Asked Questions

    Is Aadhaar authentication required for GST registration?

    The requirement depends on the applicable registration process and business structure. The GST Portal provides Aadhaar authentication as part of the registration workflow, while some applications may follow an alternative verification route.

    Can Aadhaar authentication be completed online?

    Yes, when the application is assigned the OTP-based authentication process. Some applications may instead require biometric authentication at a designated GST centre.

    Who needs to complete Aadhaar authentication?

    The applicable people depend on the constitution of the business. They can include a proprietor, partner, director, designated partner, managing committee member, or Primary Authorized Signatory.

    Is Aadhaar authentication the same as GST approval?

    No. Aadhaar authentication is an identity verification step. GST registration may require several other checks before approval.

    What happens if Aadhaar authentication fails?

    The applicant should identify the reason for failure. Common issues include incorrect details, name mismatch, OTP problems, expired links, and incomplete verification.

    What happens if the Aadhaar authentication link expires?

    The applicant may need to resend or generate the authentication link through the GST registration system and complete the verification within the applicable time.

    Can I choose No for Aadhaar authentication?

    An alternative verification process may be available. Depending on the application, this can include e-KYC documents, photo capture, and document verification.

    Does biometric authentication mean there is a problem with my business?

    Not necessarily. Biometric verification can be assigned through the GST system’s risk-based verification process. It should not automatically be treated as an accusation of wrongdoing.

    What if the name on Aadhaar and GST application is different?

    A mismatch can create an authentication problem. The applicant should check the exact records and correct genuine data-entry errors.

    Can someone else use my Aadhaar OTP?

    The OTP belongs to the person whose identity is being verified. It should not be shared casually with another person.

    What should I do after successful Aadhaar authentication?

    Continue checking the GST application status. Successful Aadhaar authentication does not automatically mean that every registration requirement has been completed.

    Does every director or partner need to authenticate?

    Not necessarily. The GST system identifies applicable people based on the business constitution and registration process.


    Final Takeaway

    Aadhaar authentication in GST registration is mainly about confirming the identity of the people connected with a business registration.

    For some applicants, the process can be completed through OTP-based authentication. For others, the GST system may require biometric verification and document checks at a designated centre.

    The most common problems are not always complicated technical issues. Simple mistakes such as incorrect names, wrong details, missed messages, expired authentication links, or incomplete verification can create delays.

    The safest approach is to prepare the information carefully, select the correct people for authentication, complete the required verification on time, and keep checking the GST registration status after submission.

    Aadhaar authentication is one part of the GST registration process. Understanding that point makes the entire process easier to follow and helps applicants respond correctly when the GST system asks for additional verification.

  • Best Ways to Cut Startup Operating Costs Without Hurting Growth

    Introduction

    Starting a business often creates pressure to spend money quickly.

    You may need software, employees, equipment, marketing, office space, accounting support, inventory and many other things. Some costs are necessary. Others may look important at first but can wait.

    This is where startup cost control becomes important.

    Startup operating costs are the regular expenses needed to keep a young business running. These can include salaries, rent, software, utilities, insurance, marketing, professional services and other recurring bills.

    The problem is not simply that startups spend too much.

    The bigger problem is that many founders do not know which costs deserve protection and which costs should be reduced.

    A cheaper option is not always better. Cutting a useful employee, customer support tool or sales channel may reduce the monthly bill but create a bigger problem later.

    A better approach is to understand where money goes, measure what each expense does, and then remove waste.

    The U.S. Small Business Administration also recommends separating startup expenses, assets and the cash needed to cover early operating shortfalls when planning a new business.


    What Are Startup Operating Costs?

    Startup operating costs are the expenses a business pays to keep its normal activities running.

    They are different from one-time setup costs.

    For example, buying equipment before launch can be a startup expense. Paying monthly software bills after launch is an operating expense.

    Common operating costs include:

    • Employee salaries
    • Office rent
    • Software subscriptions
    • Internet and phone bills
    • Insurance
    • Accounting services
    • Legal services
    • Marketing
    • Advertising
    • Inventory
    • Delivery
    • Maintenance
    • Customer support
    • Payment processing fees

    These costs can be fixed, variable, or semi-variable.

    Fixed costs

    A fixed cost does not change much when sales change.

    Examples include:

    • Office rent
    • Certain insurance premiums
    • Some software plans
    • Equipment leases

    Variable costs

    A variable cost usually changes with business activity.

    Examples include:

    • Packaging
    • Shipping
    • Product materials
    • Sales commissions
    • Payment fees

    Semi-variable costs

    These have both fixed and variable parts.

    For example, a phone or cloud service may have a basic monthly charge and additional usage fees.

    Knowing the difference matters because each type needs a different cost-control approach.


    Why Cutting Startup Costs Matters

    A startup has limited cash.

    That cash may need to support the company for months before revenue becomes stable.

    This is why cost control can have a direct effect on survival.

    Suppose a startup spends $30,000 every month but has only enough cash to cover four months of expenses.

    If the company reduces unnecessary spending by $5,000 each month, its cash can last longer.

    That extra time can give the business more room to:

    • Find customers
    • Improve its product
    • Test pricing
    • Fix operational problems
    • Build sales
    • Reach break-even

    This is one reason cash flow deserves close attention.

    The SBA notes that understanding startup costs helps businesses estimate profits, perform break-even analysis and understand how much capital they may need.


    Build a Clear Expense List

    The first step is simple:

    Know where the money is going.

    Do not start cutting expenses based on guesswork.

    Create a list of every regular business expense.

    Group them into categories such as:

    • People
    • Technology
    • Office
    • Marketing
    • Sales
    • Operations
    • Professional services
    • Insurance
    • Inventory
    • Travel
    • Banking and payment fees

    Then record:

    • Monthly cost
    • Annual cost
    • Contract length
    • Renewal date
    • Business purpose
    • Person responsible
    • Revenue or result connected with the expense

    This often reveals costs that are easy to miss.

    A $20 monthly subscription may seem harmless. Ten similar subscriptions can become a large yearly expense.


    Separate Essential Costs From Nice-to-Have Costs

    Not every expense deserves the same priority.

    A useful method is to divide expenses into three groups.

    Essential

    The business cannot operate properly without the expense.

    Examples may include:

    • Required insurance
    • Core infrastructure
    • Critical staff
    • Necessary licenses
    • Basic accounting

    Growth-related

    The expense helps the business generate future revenue.

    Examples may include:

    • Sales staff
    • Product development
    • Customer acquisition
    • Important marketing campaigns

    Optional

    The business can continue without the expense.

    Examples may include:

    • Extra software
    • Unused office space
    • Premium services that provide little value
    • Unnecessary events or travel

    This does not mean every optional cost should be removed.

    It means optional costs should face a higher value test.


    Audit Software Subscriptions

    Software can quietly become one of the easiest areas for a startup to overspend.

    A business may use separate tools for:

    • Project management
    • Communication
    • Accounting
    • Email marketing
    • Design
    • Analytics
    • Customer support
    • File storage
    • Sales
    • Human resources

    The problem appears when several tools perform almost the same job.

    For every subscription, ask:

    Who uses it?

    How often is it used?

    What business problem does it solve?

    Can another existing tool do the same job?

    Is the current plan larger than needed?

    Does the result justify the cost?

    You may discover that the business is paying for tools that were useful during an earlier stage but are no longer needed.


    Review Software Before Renewing It

    Do not wait until a yearly renewal has already happened.

    Create a renewal calendar.

    For each contract, record:

    • Renewal date
    • Current price
    • Number of users
    • Current usage
    • Cancellation terms
    • Alternative options

    Review the tool before the renewal date.

    You may be able to:

    • Downgrade the plan
    • Remove unused users
    • Move to annual billing if it makes financial sense
    • Negotiate pricing
    • Replace overlapping tools
    • Cancel the service

    The key is not to cancel software blindly.

    If a $200 tool saves several hours of employee time each month, cutting it may increase total costs.


    Avoid Hiring Too Early

    Payroll can become one of the largest startup expenses.

    Hiring should therefore match actual business needs.

    This does not mean startups should avoid employees.

    It means the business should understand what work needs to be done before creating a permanent role.

    Before hiring, ask:

    • Is this work needed every week?
    • Is the workload growing?
    • Can the current team handle it?
    • Is the role connected to revenue or a critical operation?
    • Can part of the work be automated?
    • Can a short-term specialist handle the initial need?

    For some tasks, outsourcing may be more flexible.

    For other tasks, an employee may be the better long-term choice.

    The correct decision depends on workload, skill requirements, cost and business stage.


    Use Outsourcing Carefully

    Outsourcing can reduce fixed payroll costs for certain activities.

    Examples include:

    • Bookkeeping
    • Graphic design
    • Legal support
    • Website maintenance
    • Payroll administration
    • Specialized technical work

    But outsourcing is not automatically cheaper.

    A low hourly rate can still produce a high total cost if work must be corrected several times.

    When comparing outsourcing with hiring, consider:

    Total cost = payment + management time + correction time + tools + delays

    A good outsourcing decision should reduce total business cost, not just the visible invoice.


    Control Office and Workspace Costs

    Office space can create a large fixed expense.

    If most employees can work effectively from home or a smaller workspace, a large office may not be necessary.

    Possible options include:

    • Smaller office
    • Shared workspace
    • Flexible workspace
    • Hybrid work
    • Remote work
    • Meeting rooms rented only when needed

    Location also affects business expenses. Rent, salaries, insurance, utilities and local fees can vary by location.

    However, reducing office costs should not damage customer service or team productivity.

    If customers regularly visit the office, location may have real business value.


    Negotiate With Suppliers

    Many startups accept the first price offered by a supplier.

    That can be a mistake.

    If your business has a continuing relationship with a vendor, ask about:

    • Volume discounts
    • Longer payment terms
    • Lower service fees
    • Bundled pricing
    • Better shipping terms
    • Annual contracts
    • Early payment discounts

    Payment terms can also affect cash flow.

    For example, if a supplier allows payment after 30 days instead of immediately, the business keeps its cash for longer.

    The SBA has also highlighted supplier payment terms as one way businesses can manage the timing of cash going out. Small Business Administration

    Do not negotiate only on price.

    A supplier with slightly higher pricing but better reliability may cost less overall if it reduces delays and quality problems.


    Reduce Unnecessary Marketing Spend

    Marketing is important.

    But spending more does not automatically produce more customers.

    Every marketing channel should have a clear purpose.

    Track measures such as:

    • Leads
    • Customers
    • Customer acquisition cost
    • Conversion rate
    • Revenue
    • Repeat purchases
    • Return on marketing spend

    Suppose a startup spends $5,000 on two channels.

    Channel A creates 100 qualified leads.

    Channel B creates 20 leads.

    The next question is not simply which channel produced more leads.

    You should ask how many leads became paying customers and how much revenue they produced.

    A cheap marketing channel can still be wasteful if it attracts people who never buy.


    Stop Paying for Low-Value Advertising

    Some advertising campaigns continue because nobody remembers to stop them.

    Set a review date for every major campaign.

    Before extending a campaign, check:

    • How much was spent?
    • How many qualified leads arrived?
    • How many became customers?
    • What was the revenue?
    • What was the customer acquisition cost?
    • Did customers stay?

    This makes marketing a measurable business expense instead of a permanent monthly habit.


    Reduce Inventory Waste

    For product businesses, inventory can tie up a large amount of cash.

    Buying too much inventory creates several problems:

    • Cash becomes locked in products.
    • Storage costs increase.
    • Products may become outdated.
    • Damaged goods create losses.
    • Slow-moving products take up space.

    A better approach is to study actual demand.

    Look at:

    • Sales history
    • Seasonal demand
    • Product turnover
    • Supplier lead time
    • Minimum order quantities
    • Return rates

    Do not reduce inventory so aggressively that customers face frequent stockouts.

    The goal is to find a level that supports sales without keeping too much cash locked in stock.


    Review Banking and Payment Fees

    Small fees can become meaningful when transaction volume increases.

    Review:

    • Payment processing fees
    • Bank charges
    • Transfer fees
    • Foreign exchange costs
    • Monthly account fees
    • ATM or cash handling charges

    Do not switch providers based only on the lowest advertised fee.

    Check the complete pricing structure.

    A provider with a lower transaction fee may have higher monthly charges or other costs.

    Look at the total annual expense instead.


    Reduce Unnecessary Travel

    Travel can be useful for sales, partnerships and important meetings.

    But not every meeting needs physical travel.

    Before approving a trip, ask:

    What business result is expected from this trip?

    If the purpose can be achieved through a video meeting, the lower-cost option may make more sense.

    For essential travel, control costs through:

    • Advance booking
    • Clear travel policies
    • Reasonable accommodation
    • Combined meetings
    • Expense limits

    The goal is not to eliminate travel.

    It is to make sure travel has a business purpose.


    Use Cost-Benefit Analysis Before Cutting a Major Expense

    A useful financial method is cost-benefit analysis.

    It compares what a business spends with the value it expects to receive.

    For example:

    A company pays $1,000 per month for a customer support system.

    The system reduces support workload, helps the team respond faster and prevents missed customer issues.

    Removing the system would save $1,000.

    But if the company then needs another employee or loses customers because support becomes slower, the saving may not be real.

    The correct question is:

    What happens to the business after this cost is removed?

    The SBA recommends cost-benefit analysis as a way to evaluate business decisions and understand recurring and nonrecurring costs.


    Automate Repetitive Work

    Automation can reduce the amount of manual work required for routine tasks.

    Potential areas include:

    • Invoice reminders
    • Appointment scheduling
    • Basic reporting
    • Payroll processes
    • Email responses
    • Data entry
    • Inventory alerts
    • Customer notifications

    But automation also has a cost.

    Before buying an automation tool, calculate:

    Current manual cost vs automation cost

    If an employee spends 20 hours each month on a repetitive task, automation may be useful.

    If the task takes 30 minutes each month, an expensive automation system may not make financial sense.


    Improve Cash Flow, Not Just Expenses

    Cutting expenses is only one side of cost control.

    The other side is managing when cash enters and leaves the business.

    Consider:

    • Faster customer invoicing
    • Clear payment terms
    • Online payment options
    • Follow-up on overdue invoices
    • Better supplier terms
    • Lower unnecessary inventory
    • Better cash forecasting

    This matters because profit and cash flow are not the same thing.

    A business may record a sale today but receive the money much later.

    Meanwhile, employees, suppliers and landlords may still need to be paid on time.

    SCORE also emphasizes that a cash flow statement tracks when money is received and when it is paid, rather than simply showing accounting profit.


    Track Your Monthly Burn Rate

    Burn rate is the amount of cash a startup uses over a period, usually a month.

    For example, if a startup receives $40,000 in cash during a month and pays out $50,000, its net cash movement is negative $10,000.

    That $10,000 is its net burn for that period.

    Tracking burn rate helps answer an important question:

    How long can the business continue at its current spending level?

    A startup should not look at one month alone.

    Review the trend.

    If spending rises every month while revenue remains flat, action may be needed.


    Calculate the Break-Even Point

    The break-even point is where total revenue and total costs are equal.

    At this point, the business has neither a profit nor a loss.

    For a simple product, the break-even formula can be expressed as:

    Break-even units = Fixed costs ÷ (Selling price per unit − Variable cost per unit)

    For example, suppose:

    • Fixed costs = $20,000
    • Selling price = $100
    • Variable cost = $60

    Contribution per unit is:

    $100 − $60 = $40

    Break-even volume becomes:

    $20,000 ÷ $40 = 500 units

    This calculation helps a startup understand how much it needs to sell before covering its fixed costs.

    The SBA also uses break-even analysis to help businesses understand the sales level at which total costs and revenue are equal. Small Business Administration


    Do Not Cut Costs That Protect Revenue

    This is one of the most important rules.

    A startup should not reduce an expense simply because the number looks large.

    Some costs protect future revenue.

    Examples may include:

    • Product quality
    • Customer support
    • Core engineering
    • Security
    • Required compliance
    • Reliable infrastructure
    • Sales capacity

    Cutting these costs may produce an immediate saving but create a larger loss later.

    A better question is:

    If we cut this expense, what business result could disappear with it?


    Review Every Recurring Expense Quarterly

    Cost control should not happen only when the business is short of cash.

    Create a regular review.

    Every three months, examine:

    • Payroll
    • Software
    • Rent
    • Marketing
    • Insurance
    • Contractors
    • Suppliers
    • Banking
    • Travel
    • Inventory
    • Professional services

    For each expense, ask:

    1. Do we still need it?
    2. Are we using it fully?
    3. Has the price changed?
    4. Is there overlap with another expense?
    5. Does it produce measurable value?
    6. Can the same result be achieved more efficiently?

    This turns cost control into a normal business process.


    A Simple Startup Cost-Control Framework

    Use this seven-step process:

    Step 1: List everything

    Record every recurring and one-time business expense.

    Step 2: Group the costs

    Separate fixed, variable and semi-variable expenses.

    Step 3: Measure value

    Connect each major expense with a business result.

    Step 4: Remove waste

    Cancel unused services and unnecessary spending.

    Step 5: Negotiate

    Talk to important suppliers, service providers and landlords.

    Step 6: Protect critical spending

    Do not cut expenses that directly protect customers, revenue or essential operations without careful analysis.

    Step 7: Review again

    Repeat the process regularly because startup needs change as the company grows.


    Common Mistakes When Cutting Startup Costs

    Cutting the cheapest-looking expense first

    The largest expense is not always the biggest problem.

    A small expense can have low value, while a large expense may generate significant revenue.

    Better approach: Compare cost with business impact.

    Choosing the cheapest supplier

    Low price can come with poor quality or unreliable delivery.

    Better approach: Compare total cost, quality and reliability.

    Removing employees without checking workload

    A payroll reduction may increase delays and reduce customer service.

    Better approach: Measure workload and business output first.

    Cancelling useful software

    A tool may look expensive but save many hours.

    Better approach: Measure usage and time saved.

    Ignoring cash flow

    A business can be profitable and still face a cash shortage.

    Better approach: Track expected cash inflows and outflows.

    Cutting marketing without measuring results

    Stopping marketing completely can reduce future sales.

    Better approach: Remove weak channels while protecting channels that produce customers.

    Making permanent decisions from temporary problems

    A short-term revenue drop does not always mean the business should permanently reduce important capacity.

    Better approach: Understand whether the problem is temporary or structural.


    When Should a Startup Avoid Aggressive Cost Cutting?

    Cost cutting is not always the right answer.

    Be careful when:

    • Revenue is growing quickly.
    • Customers are waiting for service.
    • Employees are already overloaded.
    • Product quality is falling.
    • Important security work is delayed.
    • Sales opportunities are being missed.
    • Suppliers are becoming unreliable.
    • The business is preparing for a major growth phase.

    In these situations, cutting too much can create a new problem.

    The goal should be efficient spending, not the smallest possible spending.


    A Practical Cost Review Checklist

    Before approving or renewing a major expense, ask:

    • Is this expense necessary?
    • What business problem does it solve?
    • Who uses it?
    • How often is it used?
    • What result does it produce?
    • Can an existing tool or process do the same job?
    • Can the price be negotiated?
    • Can the plan be reduced?
    • Is the expense fixed or variable?
    • Does it affect customer experience?
    • Does it affect revenue?
    • Does it create a legal or security risk if removed?
    • What happens if we stop paying for it?
    • Should we review it again in three months?

    This checklist helps turn cost cutting into a structured decision instead of a quick reaction.


    Key Terms to Understand

    • Operating Costs: Regular expenses required to run a business.
    • Fixed Cost: A cost that usually stays stable within a certain activity range.
    • Variable Cost: A cost that changes as business activity changes.
    • Working Capital: Money available to support normal business operations.
    • Burn Rate: The rate at which a startup uses cash.
    • Break-Even Point: The point where revenue equals total costs.
    • Cash Flow: Money entering and leaving a business.
    • Cost-Benefit Analysis: A comparison between the cost of an action and the value it may create.
    • Customer Acquisition Cost: The average amount spent to acquire a customer.
    • Recurring Expense: A cost that repeats on a regular schedule.
    • Contribution Margin: Selling price minus the variable cost associated with a product or service.
    • Runway: The amount of time a startup can continue operating with its available cash at its current burn rate.

    FAQs About Startup Operating Costs

    What are the main startup operating costs?

    Common costs include salaries, rent, software, marketing, insurance, professional services, utilities, inventory, payment fees and other expenses needed for daily operations.

    How can a startup reduce operating costs?

    Start by listing all expenses. Then remove unused services, reduce overlapping tools, negotiate supplier prices, control hiring and measure marketing performance.

    Should startups cut employee costs first?

    Not necessarily. Employees may be directly responsible for sales, product development, customer support or other important activities. Cost decisions should consider the value and workload connected with each role.

    Is outsourcing cheaper than hiring?

    Not always. Outsourcing can be useful for specialized or irregular work, but the total cost should include management time, corrections, delays and service fees.

    How can software costs be reduced?

    Review subscriptions regularly. Remove unused accounts, downgrade plans, combine overlapping tools and compare the total value of each service with its cost.

    What is the difference between startup costs and operating costs?

    Startup costs are generally related to preparing the business to begin operations. Operating costs are the recurring expenses involved in running the business.

    Why is cash flow important for a startup?

    Cash is needed to pay bills when they become due. A business can have recorded sales and still face a cash shortage if customers pay later.

    How often should startup expenses be reviewed?

    A quarterly review is a practical starting point. Major contracts, renewals and unusual spending should also be reviewed when they occur.

    Should a startup stop spending on marketing to save money?

    Usually, the better approach is to measure which marketing activities produce useful results. Weak channels can be reduced while effective channels are protected.

    What is burn rate?

    Burn rate shows how quickly a startup is using its available cash. Tracking it helps founders understand how long their current cash position may support operations.

    What is the safest way to cut startup expenses?

    Start with waste and duplication. Then review contracts, unused tools, supplier prices and processes. Avoid cutting essential activities without understanding the likely business impact.

    Can reducing costs improve a startup’s runway?

    Yes. If the business reduces unnecessary cash spending while maintaining revenue generation, the same cash balance can potentially support operations for a longer period.


    Conclusion

    Cutting startup operating costs is not about making the business spend as little as possible. It is about making every important expense easier to justify.

    Start by understanding where money goes. Separate essential costs from optional spending. Review software, hiring, office space, suppliers, marketing, inventory and recurring services. Then use cash flow, burn rate and break-even analysis to understand the wider effect of each decision.

    Most importantly, do not confuse a lower bill with a better business decision. A cost is worth reviewing when it creates little value, overlaps with another expense or no longer matches the company’s current needs.

    A healthy startup does not simply spend less. It spends carefully, measures the result, protects important activities and removes waste before that waste becomes a long-term habit.

  • Building an SRE Operating Model for Applications With Growing Traffic

    Websites crash. Applications freeze. Users get frustrated, and businesses lose revenue.

    Keeping computer systems online requires careful planning, smart design, and daily care. Modern tech platforms run on complex cloud networks that demand constant attention.

    This article explores SRESchool.com. It explains how the platform helps engineers and enterprises build reliable software using core Site Reliability Engineering practices.

    What Is SRESchool.com?

    SRESchool.com is a global learning and professional platform focused entirely on Site Reliability Engineering. The site teaches engineers how to build stable systems that stay online and scale under heavy user demand.

    Instead of treating uptime as guesswork, the platform provides structured educational pathways. Its core areas include:

    • SRESchool Training: Practical lessons covering system metrics, monitoring, and reducing manual toil.
    • SRESchool Certification: Structured assessment paths for engineers, architects, and technical leaders.
    • Site Reliability Engineering Course: Comprehensive learning guides built for cloud, software, and platform professionals.
    • SRESchool Consulting: Professional advice to help organizations improve reliability maturity and incident workflows.
    • SRESchool as a Service: Ongoing expert support for cloud infrastructure and production platforms.

    What Is Site Reliability Engineering?

    Site Reliability Engineering is a professional field that applies software engineering to IT operations. In older tech models, operators managed servers manually by hand. They waited for failures to happen and scrambled to fix them after the fact.

    SRE replaces manual firefighting with automation and software code. Engineers focus on performance, system availability, and fast recovery.

    Imagine an online ticket booking portal. If millions of users try to buy tickets at once, the backend must handle the load without breaking. An SRE makes sure the system scales automatically and warns the team before servers run out of memory.

    Why Reliability Matters in Modern Systems

    Today’s applications rely on complex cloud networks and dozens of microservices. If one minor component fails, it can trigger a chain reaction that crashes the entire application.

    Downtime damages trust and hurts business growth. Waiting for a system to break before fixing it no longer works. Modern infrastructure requires proactive planning and safety margins to absorb unexpected errors gracefully.

    SRESchool Training for Real Production

    Good training teaches engineers how applications behave under real-world pressure. Core topics include:

    • Reliability Principles: How code, hardware, and networks interact.
    • System Tracking: Watching app health continuously.
    • Emergency Response: Staying calm and organized during an outage.
    • Toil Reduction: Writing scripts to handle repetitive manual chores.

    Training helps engineers find design flaws before users experience them in production.

    SRE Certification and Knowledge

    An SRE Certification gives professionals a structured way to prove their grasp of reliability rules. It covers monitoring, incident management, and automation techniques.

    However, a certificate is not a substitute for hands-on experience. Passing an exam proves conceptual understanding, but true skill comes from fixing live production bugs and learning from real outages. Certification guides learning, while practice builds mastery.

    Exploring the Site Reliability Engineering Course

    A complete course takes learners through a logical path:

    1. Foundations: Learning what system reliability means in practice.
    2. Metrics: Setting clear performance targets.
    3. Budgets: Balancing fast feature updates with safety limits.
    4. Observability: Using logs and metrics to track internal system states.
    5. Incident Response: Fixing outages quickly.
    6. Automation: Letting code handle routine tasks.

    Each stage prepares technical staff for real-world production stress.

    Becoming a Certified Site Reliability Engineer

    A Certified Site Reliability Engineer focuses on deep technical operations. They measure how well a service performs for the end user. They manage error budgets and lead post-incident reviews.

    Certification validates these skills, helping technical leaders guide their organizations with data-driven confidence.

    SRE Consulting for Growing Teams

    Even skilled engineering teams run into complex architectural walls. SRE Consulting brings outside experts in to review existing setups.

    Consultants examine monitoring pipelines, evaluate reliability maturity, and help leadership build clear improvement roadmaps. This outside view helps companies catch blind spots they might miss internally.

    SRE as a Service for Ongoing Support

    Hiring a large reliability team from scratch is difficult. SRE as a Service offers an alternative by providing ongoing operational backup.

    Growing companies partner with external experts to manage cloud infrastructure and monitoring workflows. This gives teams enterprise-level support while internal developers focus on building core product features.

    Corporate SRE Training for Teams

    Every business has a unique technical stack. Corporate SRE Training customizes lessons to fit specific enterprise environments.

    Teams learn together using tools from their daily work. This shared experience helps developers and IT staff speak the same language and solve production bottlenecks faster.

    SRE Tutorials for Beginners

    An SRE Tutorial breaks large topics into simple, single steps. Tutorials help beginners learn one skill at a time—like configuring an alert rule—without feeling overwhelmed.

    Small steps build confidence so learners can test ideas safely before touching live systems.

    Essential SRE Tools

    Tools do not create reliability on their own, but the right technology makes managing complex systems much easier.

    Tool CategoryWhat It DoesProblem It Solves
    MetricsTracks CPU and memory use.Stops teams from flying blind.
    LoggingRecords app event text.Helps find exact error lines.
    TracingFollows requests across microservices.Finds slow network spots.
    AlertingSends warning notifications.Warns teams before crashes happen.
    IncidentsOrganizes on-call shifts.Stops chaos during outages.

    Tools help, but they cannot replace thoughtful system design.

    SLIs, SLOs, and Error Budgets

    Teams cannot manage reliability by guessing. They use clear measurements:

    • SLI (Service-Level Indicator): A direct measure of performance, like page load speed.
    • SLO (Service-Level Objective): The target uptime goal set by the team, like 99.9% success.
    • Error Budget: The amount of downtime allowed by the SLO.

    Error budgets bridge the gap between developers and IT staff. If the budget is safe, developers ship features quickly. If the budget runs out, the team pauses new releases to fix stability issues.

    Monitoring vs. Observability

    People often mix these up, but they serve different purposes:

    • Monitoring tells you when something breaks.
    • Observability tells you why it broke.

    Collecting data is not enough. Engineers must understand what the data means to troubleshoot complex failures.

    Incident Response and Post-Mortems

    When things break, a clear response plan stops panic:

    1. Alert: Automated systems flag abnormal behavior.
    2. Triage: An engineer checks the severity.
    3. Fix: The team applies a patch or rolls back a bad change.
    4. Review: A post-incident report asks what went wrong and how to prevent a repeat.

    Blameless post-mortems focus on fixing system flaws rather than pointing fingers at people.

    Automation and Toil Reduction

    Toil is repetitive, manual work that does not scale as a service grows. Examples include restarting servers by hand or copying data between spreadsheets.

    SRE uses automation to eliminate toil. Engineers write scripts to handle routine tasks. However, bad scripts can break things quickly, so automation must be tested carefully.

    Capacity Planning and Cloud Reliability

    Traffic spikes happen. Marketing campaigns can double user numbers overnight.

    Capacity planning forecasts future resource needs using past trends. Cloud reliability ensures servers scale up during surges and scale down to save costs when demand drops.

    Distributed Systems and Production Engineering

    Modern apps use dozens of independent microservices. Network links can drop, and servers can fail.

    Production engineering builds fault tolerance into these systems so one minor backend glitch does not take down the entire user-facing app.

    Real-World SRE Examples

    Scenario 1: Traffic Spike

    • Problem: An online store slows down during a major sale.
    • Signal: High CPU use and slow page loads.
    • Fix: Adding caching layers and optimizing database queries restores normal speed.

    Scenario 2: Alert Fatigue

    • Problem: Teams receive hundreds of fake alerts at night and start ignoring them.
    • Fix: Adjusting alert thresholds so only real user-facing problems trigger pages.

    The Learning Ecosystem

    The learning areas on SRESchool.com connect naturally:

    • Start with basic SRE Training and step-by-step SRE Tutorials.
    • Move to a complete Site Reliability Engineering Course.
    • Learn how to use essential SRE Tools.
    • Earn an SRE Certification to become a Certified Site Reliability Engineer.
    • Scale up company workflows using SRE Consulting, SRE as a Service, or Corporate SRE Training.

    Benefits of Learning SRE

    Studying SRE gives technical professionals real advantages:

    • Deep knowledge of how cloud systems behave under stress.
    • Better troubleshooting and observability skills.
    • Calmer incident response habits.
    • Less manual toil through smart automation.
    • Stronger capacity planning.

    Common SRE Mistakes

    Teams often fall into these common traps:

    • Buying expensive tools before learning basic concepts.
    • Collecting logs without knowing how to read them.
    • Setting up too many noisy alerts.
    • Treating operations like manual server administration instead of software design.

    Recognizing these pitfalls helps teams build healthier engineering cultures.

    Practical SRE Learning Path

    1. Learn Basics: Understand system reliability.
    2. Master Metrics: Define SLOs and error budgets.
    3. Study Observability: Set up logs and traces.
    4. Practice Incidents: Learn how to triage alerts.
    5. Build Automation: Write scripts for routine fixes.
    6. Explore Networks: Understand service dependencies.
    7. Review Post-Mortems: Read past incident logs.
    8. Get Certified: Validate your skills.

    Who Can Benefit?

    • Beginners: People breaking into cloud tech.
    • Software Engineers: Developers who want to see how code runs live.
    • DevOps Pros: Engineers sharpening automation skills.
    • Platform Engineers: Staff maintaining cloud networks.
    • Leaders: Managers setting uptime goals.
    • Companies: Businesses maturing their tech stacks.

    Frequently Asked Questions

    What is Site Reliability Engineering?

    It is a professional field that uses software code to manage IT operations and keep systems stable.

    What does SRE training cover?

    It covers metrics, SLOs, error budgets, monitoring, and incident response.

    Why use error budgets?

    They balance the speed of new features against system stability.

    What is an SLO?

    An internal uptime goal set by an engineering team.

    How does SRE consulting help?

    Experts review existing setups to help teams reduce downtime.

    What is SRE as a Service?

    It is ongoing, outsourced cloud reliability support.

    What skills do certified engineers need?

    They need strong observability, automation, and incident response skills.

    How do post-mortems help?

    They find root causes of outages so bugs do not repeat.

    What is toil?

    It is repetitive manual work that offers no lasting value.

    Can beginners use SRESchool.com?

    Yes, the platform offers tutorials for all skill levels.

    Conclusion

    Apps must stay online, and users expect speed every single day. Good tech teams plan for failures early by using smart tools and clear uptime goals. Platforms like SRESchool.com give engineers the exact skills they need to succeed in modern cloud environments. In the end, reliable systems lead directly to happy users and long-term business success.

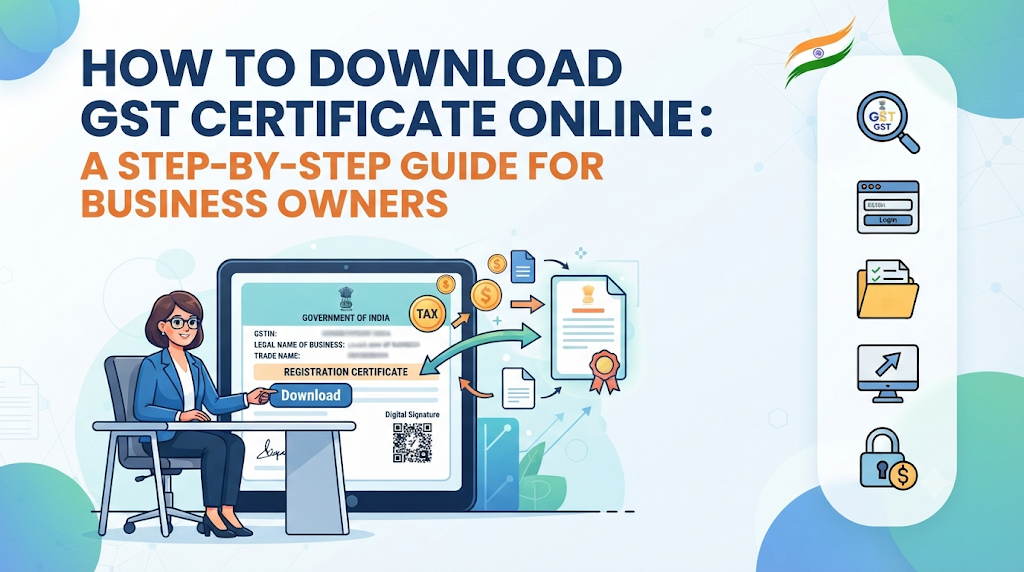
  • How to Download GST Certificate Online: A Step-by-Step Guide for Business Owners

    Introduction

    Getting your Goods and Services Tax registration is a major milestone for any business. It makes your operations legal, lets you collect tax from customers, and allows you to claim tax credits on your purchases.

    However, once registration is complete, many business owners struggle to find or download their official certificate when banks, vendors, or government offices ask for proof. Paper copies get lost easily, and knowing how to get a digital copy quickly is essential.

    This guide will show you how to log into the official portal, navigate the menus, and download your GST certificate without hassle.

    What Is a GST Certificate?

    A GST certificate is an official document issued by the tax department to businesses registered under the Goods and Services Tax system.

    It contains vital details about your business, including your Legal Name, Trade Name, Principal Place of Business, registration date, and your unique 15-digit GSTIN (Goods and Services Tax Identification Number).

    Why It Matters

    • Legal Compliance: You must display your certificate at your main place of business.
    • Business Verification: Vendors and partners often ask for your certificate to verify your tax status before working with you.
    • Bank Work: Banks require your GST certificate to open current accounts or process business loans.

    Prerequisites Before You Download

    Before you log in to download your certificate, make sure you have the following ready:

    • GSTIN: Your 15-digit Goods and Services Tax Identification Number.
    • Portal Login Details: Your username and password for the GST portal.
    • Registered Mobile or Email: Access to the phone or email linked to your account for receiving One-Time Passwords (OTPs).

    Step-by-Step Guide to Downloading Your GST Certificate

    Follow these simple steps to download your certificate directly from the official portal.

    Step 1: Visit the Official GST Portal

    Open your web browser and go to the official Indian GST portal (www.gst.gov.in).

    Step 2: Log In to Your Account

    Click on the Login button at the top right corner of the homepage. Enter your username, password, and the captcha code shown on the screen. Click Login to enter your dashboard.

    Step 3: Navigate to User Services

    Once you are on your dashboard, look at the top menu bar. Click on the Services tab. A drop-down menu will appear. Hover over User Services and click on View/Download Certificates.

    Step 4: Locate Your Registration Certificate

    The system will display a list of available certificates related to your account. Look for the document labeled Registration Certificate (FORM GST REG-06).

    Step 5: Download the PDF

    Click the Download icon or link next to the certificate. The file will download to your computer or phone as a PDF document. Open the file to check that all your business details are correct.

    Common Mistakes to Avoid

    • Using Unofficial Websites: Never enter your login credentials on third-party websites promising quick downloads. Always use the official government portal.
    • Forgetting to Save a Backup: Do not keep your certificate in a single downloads folder. Save a digital backup in a secure cloud folder and print a physical copy to keep at your office.
    • Ignoring Typo Errors: Check your certificate immediately after downloading. If you spot a spelling mistake in your business name or address, file an amendment application on the portal right away.

    Key Terms

    • GSTIN: A unique 15-digit code assigned to every business registered under the tax system.
    • FORM GST REG-06: The official legal form number of the Goods and Services Tax registration certificate.
    • Portal Dashboard: The main control panel screen you see after logging into your account.
    • Principal Place of Business: The main headquarters or primary location where your business operates.

    Frequently Asked Questions

    Is there any fee to download the GST certificate?

    No. Downloading your certificate from the official government portal is completely free of charge. Do not pay any third-party service to download it.

    Can I download my GST certificate without a password?

    No. You must log in with your valid username and password, and complete an OTP verification step to access your dashboard and download the certificate.

    What should I do if my certificate is not visible on the portal?

    If you cannot find your certificate, check if your application is still pending approval by the tax officer. Once approved, the certificate usually appears within a few hours.

    Can I laminate my GST certificate?

    Yes. Many business owners laminate their physical copy to protect it from damage and display it prominently at their workplace as required by law.

    How many copies of the certificate should I keep?

    Keep a digital PDF copy on your secure work computer and print at least one physical copy to display at your primary business location.

    Conclusion

    Downloading your GST certificate is a quick process once you know the exact steps. By using the official portal, navigating to user services, and saving your PDF securely, you ensure your business stays compliant and ready for any verification check. Keep your login details safe and maintain backups so you never get caught unprepared.

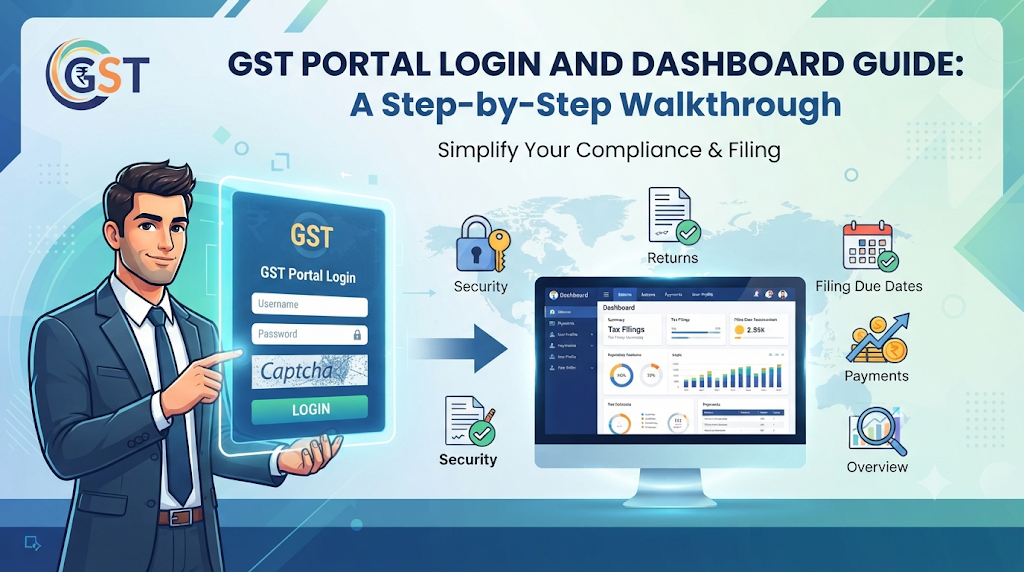
  • GST Portal Login and Dashboard Guide: A Step-by-Step Walkthrough

    Introduction

    Filing taxes used to mean long queues, paper forms, and dealing with government offices in person. Today, India’s indirect tax system has moved almost entirely online through the Goods and Services Tax network.

    For many business owners, however, opening the official tax website can feel intimidating. The screen fills up with terms like ITC (Input Tax Credit), GSTR-3B, and electronic cash ledgers. If you press the wrong button, you might worry about making a filing mistake or facing a penalty.

    This guide will walk you through the GST portal login process and help you understand your dashboard. You will learn how to sign in securely, find your way around the main screens, and keep your business tax records organized without stress.

    What Is the GST Portal?

    The GST portal is a secure, shared digital platform managed by the Goods and Services Tax Network (GSTN). It connects taxpayers, banks, and tax departments into a single system.

    Think of it as your personal online office for all indirect taxes. Instead of visiting a tax office, you use this portal to register your business, file monthly or quarterly tax returns, pay taxes online, and check your tax ledger balances.

    Why It Matters

    Before this portal existed, businesses had to deal with different tax rules across different states. The GST portal brings everything under one roof. It makes tax compliance transparent and allows you to track whether your suppliers have paid their taxes properly.

    How the GST Portal Works

    The portal acts as a bridge between you and the tax department. When you make a sale and collect tax from a customer, you report that sale on the portal. When you buy goods for your business and pay tax to your supplier, you record those purchases on the portal to claim tax credits.

    The system calculates what you owe, matches your records with your suppliers’ records, and lets you pay the difference online.

    Basic Workflow

    1. Login: You enter your secure credentials.
    2. Dashboard Review: You check your filing status and ledger balances.
    3. Data Entry: You upload your sales and purchase details.
    4. Filing and Payment: You submit your tax returns and pay any tax due through net banking, UPI, or credit cards.

    Step-by-Step: How to Complete Your GST Portal Login

    Logging into the portal is straightforward once you have your credentials ready. Follow these simple steps:

    Step 1: Visit the Official Website

    Open your web browser and go to the official URL: www.gst.gov.in.

    • Practical Tip: Always check the website address bar to ensure you are on the secure official site. Look for the padlock symbol before the web address.

    Step 2: Click the Login Button

    On the top right corner of the homepage, click the “Login” button.

    Step 3: Enter Your Credentials

    A login page will appear asking for:

    • Username: The unique user ID created during your GST registration.
    • Password: Your secret login password.
    • Captcha: A set of letters and numbers shown on the screen to prove you are a human. Type these characters exactly as shown.

    Step 4: Access Your Dashboard

    Click the “Login” button below the form. If your details are correct, the system will open your personalized GST dashboard.

    What Happens If You Forget Your Password?

    It is common to forget passwords, especially if you only log in once a month to file returns. Here is how to fix it:

    1. On the login page, click the link that says “Forgot Password?”.
    2. Enter your Username and the captcha code.
    3. The system will send an OTP (One-Time Password) to your registered mobile number and email address.
    4. Enter the OTP on the screen.
    5. Create a new, strong password and confirm it. You can now log in using your new credentials.

    Understanding Your GST Dashboard

    When you log in successfully, the main screen you see is your dashboard. It acts as your control center.

    The dashboard is divided into several useful tabs and sections:

    1. Services Tab

    This is where you will do most of your work. It includes sub-menus for:

    • Registration: To apply for amendments or add new business places.
    • Returns: To view, track, and file your tax returns (like GSTR-1 and GSTR-3B).
    • Payments: To create challans and pay tax dues.
    • User Services: To view notices, orders, and apply for refunds.

    2. Returns Dashboard

    This section shows your filing status for different financial periods. It uses color codes or status markers to show whether a return is filed, delayed, or pending.

    3. Electronic Ledgers

    The portal maintains three main digital ledgers for your money:

    • Electronic Cash Ledger: Shows cash deposits you have made that are waiting to be used for tax payments.
    • Electronic Credit Ledger: Shows the Input Tax Credit (ITC) you have accumulated from your business purchases.
    • Electronic Liability Register: Shows your total tax, interest, and penalty dues for the current period.

    Practical Examples: Navigating Daily Use

    Let us look at how a small business owner uses the dashboard in real life.

    Example: Filing a Monthly Return

    Rohan runs a small electronics shop. Every month, he logs into the GST portal to file his return.

    1. He clicks on Services, then Returns, and selects Returns Dashboard.
    2. He chooses the current financial year and filing period (for example, last month).
    3. He opens the relevant return form (such as GSTR-3B for summary tax payment).
    4. He reviews the auto-populated numbers, checks his tax liability, and uses the Electronic Cash Ledger to pay any remaining tax balance via net banking.
    5. Finally, he clicks File with DSC (Digital Signature Certificate) or File with EVC (Electronic Verification Code via mobile OTP) to complete the process.

    Common Mistakes to Avoid

    Even experienced users make mistakes on the portal. Here are some common pitfalls and how to avoid them:

    • Waiting Until the Last Day:
      • Why people do it: Procrastination or waiting for final client payments.
      • Why it causes problems: Millions of taxpayers try to log in on the due date, which can slow down the portal or cause server timeouts.
      • What to do instead: File your returns at least two to three days before the official due deadline.
    • Ignoring Auto-Populated Data:
      • Why people do it: Assuming the computer system is always 100% correct without checking.
      • Why it causes problems: If your suppliers missed filing their invoices, your tax credit claims might not match, leading to official notices later.
      • What to do instead: Always cross-verify your portal data with your internal accounting books before final submission.
    • Using Unsecured Networks:
      • Why people do it: Logging in from public Wi-Fi networks at cafes or airports.
      • Why it causes problems: Exposes your business tax credentials to potential data theft.
      • What to do instead: Always use a secure, private internet connection when accessing tax portals.

    Risks and Limitations

    While the GST portal has made tax filing paperless, it comes with certain operational realities:

    RiskWhy It MattersHow to Reduce It
    Server SlowdownsThe portal can slow down significantly on filing due dates, preventing timely submissions.Complete your invoice matching and data entry early in the month.
    Technical GlitchesOccasional browser compatibility issues or OTP delivery delays can stall your work.Clear your browser cache, keep backup phone numbers active, and try standard browsers like Chrome or Edge.
    Session TimeoutsFor security, the portal logs you out automatically after a period of inactivity, which can erase unsaved draft work.Save your work frequently while filling out online tax forms.

    Checklist Before You Log Out

    Before you close your browser after a GST portal session, run through this quick checklist:

    • Did you save or submit all your draft data properly?
    • Did you download and save copies of your filed return acknowledgments (PDF)?
    • Did you verify that your electronic cash or credit ledger balances updated correctly?
    • Did you log out safely using the “Logout” button instead of just closing the browser window?

    Key Terms

    • GSTN: Goods and Services Tax Network; the private company that manages the technical infrastructure of the portal.
    • Challan: A payment receipt form generated on the portal used to deposit tax money into the government account.
    • ITC (Input Tax Credit): The tax you paid on business purchases that you can subtract from the tax you collected on sales.
    • EVC (Electronic Verification Code): An OTP sent to your registered mobile number used to sign and submit tax documents securely.
    • DSC (Digital Signature Certificate): A secure USB token device used by companies and larger businesses to legally sign tax returns.
    • GSTR-3B: A monthly summary return where taxpayers declare their summary sales, purchases, and tax payments.
    • GSTR-1: A detailed return where businesses report all outward supplies (sales) made during the period.

    FAQs

    1. Is the GST portal login free to use?

    Yes, accessing the portal and filing your returns online is completely free. However, if you hire a professional tax accountant or use third-party accounting software to connect with the portal, they may charge service fees.

    2. Can I use the GST portal on my mobile phone?

    While you can open the website on a mobile browser, it is much easier to navigate, check tables, and file returns using a desktop computer or laptop due to the large amount of data involved.

    3. What should I do if I enter the wrong password too many times?

    If you enter incorrect passwords repeatedly, the portal will temporarily lock your account for security reasons. You can either wait for the lockout period to end (usually 30 minutes) or use the “Forgot Password” link to reset it immediately.

    4. Why am I not receiving my login OTP?

    OTP delays can happen due to poor mobile network coverage or heavy traffic on the telecom gateway. Wait a couple of minutes and click the “Resend OTP” button. Ensure your registered mobile number is active.

    5. Do I need a Digital Signature to log in?

    No, a Digital Signature Certificate (DSC) is not required just to log in and view your dashboard. However, certain entities, such as companies and Limited Liability Partnerships (LLPs), must use a DSC or an EVC to finally submit and sign their tax returns.

    6. Can I have multiple users logging into the same GST account?

    Yes, you can create additional user profiles (like accountants or managers) by assigning specific roles through the portal’s user management settings, keeping your primary login credentials secure.

    Conclusion

    Mastering the GST portal login and dashboard is a vital skill for anyone running a business or managing accounts. While the screens may look complex at first glance, breaking them down into simple sections—like the returns dashboard and electronic ledgers—makes navigation much easier.

    By logging in early, checking your supplier data carefully, and following safe digital habits, you can handle your tax compliance smoothly and keep your business safe from avoidable penalties.

  • A Guide to Artificial Intelligence for IT Operations and Modern Systems Management

    Modern digital systems generate massive streams of operational data every second. Applications run across cloud servers, microservices communicate constantly, and user traffic fluctuates dynamically. For system administrators and engineers, keeping track of this vast ecosystem using traditional dashboards can feel like finding a needle in a haystack.

    When thousands of alerts fire at once, teams often struggle to find the root cause of an outage before users notice. This operational challenge is where Artificial Intelligence for IT Operations comes into play. Platforms like TheAIOps.com help organizations and technical professionals explore how automation, machine learning, and advanced analytics transform traditional IT management into proactive, intelligent operations.

    What Is TheAIOps.com?

    TheAIOps.com is a specialized knowledge, learning, and consulting hub focused entirely on modern IT operations driven by artificial intelligence. Rather than treating monitoring as a reactive chore, the platform explores how intelligent systems can collect, analyze, and act on operational data automatically.

    The platform connects several key technical areas:

    • Structured learning resources and study paths for professionals.
    • Guidance on selecting and integrating modern operational tools.
    • Strategic insights for organizations planning operational transformation.
    • Deep dives into observability, event correlation, and automated remediation.

    By bringing these disciplines together, TheAIOps.com serves as an educational bridge between traditional system administration and next-generation autonomous operations.

    Understanding Artificial Intelligence for IT Operations

    At its core, Artificial Intelligence for IT Operations combines big data with machine learning algorithms to automate and streamline IT management tasks.

    Traditional monitoring relies on static thresholds. If CPU usage crosses 90 percent, an alert triggers. However, modern workloads fluctuate naturally, leading to false alarms or missed issues hidden deep within complex log files.

    Intelligent IT operations platforms solve this by establishing baselines of normal behavior. Instead of waiting for a hard threshold break, the system learns what normal looks like across logs, metrics, and traces. When an unusual pattern appears, the platform flags it immediately, helping engineers catch performance dips before they cause downtime.

    Exploring Structured Learning and Certification

    As organizations adopt intelligent monitoring platforms, the demand for skilled professionals continues to grow. Structured educational pathways help engineers build competence step by step.

    AIOps Training

    Effective training programs move beyond basic theory to cover real-world operational scenarios. Learners explore core concepts such as intelligent monitoring, anomaly detection, event correlation, root-cause analysis, and automated remediation. The goal is to help technical staff understand how to interpret machine-driven insights rather than just staring at dashboards.

    AIOps Certification

    For professionals looking to validate their knowledge, certification programs offer a structured way to demonstrate competence in modern IT management. While hands-on practice remains essential, structured exams help organize complex topics into measurable milestones. Certification highlights a professional’s familiarity with modern operational tools, data pipelines, and automation frameworks.

    AIOps Course Content

    A comprehensive course typically follows a logical progression, starting with basic IT operations and moving toward advanced automation:

    1. Fundamentals of IT monitoring and log management.
    2. Basics of machine learning in operational data analysis.
    3. Techniques for detecting anomalies and reducing alert noise.
    4. Strategies for event correlation and root-cause discovery.
    5. Implementing automated incident response workflows.

    Tools, Platforms, and Implementation Strategies

    Adopting intelligent operations requires the right mix of technology and planning. Understanding the difference between individual utilities and a unified platform is essential for success.

    AIOps Tools

    Engineers use various tool categories to maintain visibility over infrastructure. Log management tools collect text logs, monitoring tools track resource metrics, and tracing tools follow requests across distributed microservices. Each tool serves a specific purpose, but managing them separately can create data silos.

    AIOps Platform

    An AIOps platform acts as a central nervous system for operational data. It ingests logs, metrics, and traces, processes the information through machine learning models, and correlates related events. By grouping hundreds of related alerts into a single incident ticket, the platform cuts through noise and points engineers directly toward the underlying problem.

    AIOps Implementation

    Implementing intelligent operations is an engineering journey rather than an overnight software installation. A successful rollout typically involves:

    • Assessing the existing monitoring environment and data quality.
    • Identifying high-impact use cases, such as reducing alert fatigue.
    • Connecting relevant data sources and testing machine learning models.
    • Setting up controlled automation with human approval steps.
    • Measuring results and refining rules over time.

    Consulting, Services, and Professional Skills

    Many organizations partner with external experts to accelerate their adoption journey. Advisory services help bridge the gap between legacy infrastructure and modern automated workflows.

    AIOps Consulting and Services

    Consulting engagements typically focus on environment assessments, tool evaluations, and architecture planning. Services may include designing custom data pipelines, setting up observability dashboards, and creating reliable automation scripts. These services ensure that organizations invest in solutions that match their specific operational maturity.

    The Role of an AIOps Engineer

    An AIOps Engineer bridges the gap between software development, data science, and system administration. Essential skills include a strong foundation in Linux and cloud infrastructure, familiarity with observability tools, scripting capabilities in Python or Go, and a basic understanding of machine learning models. These professionals design the pipelines that turn raw operational data into actionable insights.

    Core Technical Concepts in Modern Operations

    To understand how intelligent systems operate under the hood, it helps to examine the underlying mechanics of data collection and analysis.

    Monitoring vs. Observability

    • Monitoring tells you whether a system is working or broken by checking predefined metrics.
    • Observability allows you to understand why a system is behaving a certain way by examining its internal outputs, including logs, metrics, and traces.

    Anomaly Detection and Event Correlation

    Anomaly detection algorithms watch system behavior continuously. If a database latency metric deviates from its historical pattern on a Tuesday afternoon, the system flags it.

    Event correlation takes this a step further. During a major outage, a single server failure can trigger thousands of downstream alerts. Event correlation engines group these symptoms together, identifying that a single network switch failure caused all subsequent warnings.

    Predictive Analytics and Automated Remediation

    Predictive models analyze historical capacity trends to forecast disk space exhaustion or memory leaks before they cause crashes. Once an issue is understood, automated remediation scripts can restart services, clear caches, or scale up cloud resources without requiring manual intervention.

    Common Challenges and Mistakes

    While intelligent operations offer powerful benefits, teams often encounter common pitfalls during adoption:

    • Starting with tools instead of problems: Buying expensive software without defining clear operational goals.
    • Ignoring data quality: Feeding incomplete or messy logs into machine learning models, leading to inaccurate insights.
    • Over-automation: Automating responses before fully trusting the system, which can sometimes make outages worse.
    • Neglecting human review: Removing human oversight entirely instead of maintaining a collaborative human-in-the-loop model.

    Conclusion

    The shift toward intelligent IT operations represents a natural evolution in how organizations manage complex digital infrastructure. By combining operational data, observability tools, and machine learning analytics, teams can move away from reactive firefighting. Platforms like TheAIOps.com provide the educational foundation and professional guidance needed to navigate this transition successfully, helping engineers build resilient, efficient, and modern IT environments.

    Frequently Asked Questions

    1. What is the primary purpose of TheAIOps.com?

    TheAIOps.com serves as a specialized knowledge and learning platform dedicated to exploring how artificial intelligence, machine learning, and automation transform modern IT operations.

    2. How does AIOps differ from traditional IT monitoring?

    Traditional monitoring relies on static thresholds to trigger alerts, whereas AIOps uses machine learning to establish dynamic baselines, detect subtle anomalies, and correlate related events automatically.

    3. What subjects are typically covered in AIOps training programs?

    Training programs generally cover operational fundamentals, intelligent monitoring, log analysis, anomaly detection, event correlation, root-cause analysis, and automated remediation workflows.

    4. Do I need a strong background in data science to learn AIOps?

    No. While a basic understanding of machine learning concepts is helpful, AIOps primarily builds upon standard IT administration, cloud infrastructure, and systems engineering knowledge.

    5. What role does an AIOps platform play in an enterprise?

    An AIOps platform ingests operational data from multiple monitoring tools, reduces alert noise, correlates related events, and helps engineers pinpoint root causes quickly.

    6. What is the difference between monitoring and observability?

    Monitoring tells you when a system fails, while observability provides the detailed telemetry—logs, metrics, and traces—needed to understand the internal state and root cause of the failure.

    7. Why is data quality important for intelligent IT operations?

    Machine learning models rely on accurate historical data. Inconsistent, noisy, or missing log data can lead to false positives and unreliable anomaly detection.

    8. What skills are most important for an AIOps Engineer?

    Key skills include a solid grasp of cloud architecture, system troubleshooting, observability tools, scripting languages, and familiarity with data pipeline management.

    9. What should organizations consider before implementing AIOps?

    Organizations should assess their current monitoring maturity, define specific operational bottlenecks, clean up their data sources, and establish clear goals for automation.

    10. Can automation completely replace human operators in IT management?

    No. Automated remediation handles repetitive tasks and fast responses, but human oversight remains essential for complex troubleshooting, strategic planning, and approval workflows.

  • SRE Troubleshooting Skills: Finding the Cause Behind Production Problems

    Introduction

    Modern digital applications must run continuously. When an online shopping platform, banking app, or streaming service crashes, millions of users experience frustration, and businesses lose revenue instantly. Traditional IT teams often struggle to keep large, complex systems running smoothly because they rely on manual troubleshooting and reactive fixes.

    To solve this challenge, organizations turn to Site Reliability Engineering. SRE bridges the gap between software developers who write code and operations teams who keep systems running. However, learning these skills requires structured guidance. Understanding the right SRE training paths, certifications, tools, and best practices helps professionals build reliable infrastructure without burning out engineering teams.

    What Is Site Reliability Engineering?

    Site Reliability Engineering is a discipline that applies software engineering principles to infrastructure and operations problems. Instead of treating system administration as a manual, repetitive chore, SRE teams write code and build automation software to manage systems, prevent failures, and scale applications efficiently.

    An SRE team focuses on making systems dependable. When a system is reliable, users can access it whenever they need it, and it performs consistently even under heavy traffic.

    Why Does It Matter?

    As applications grow larger and move to cloud environments, manual management becomes impossible. A single engineer cannot monitor thousands of servers by hand. SRE matters because it introduces repeatable, automated processes that catch problems before they impact users, reducing downtime and protecting business value.

    How SRE Works

    Site Reliability Engineering works by treating operations as a software problem. If a manual task must be repeated more than once, an SRE engineer writes a program or script to automate it. This philosophy saves time and reduces human error.

    SRE practices rely heavily on measurement. Engineers define clear targets for how dependable a system should be and use monitoring software to track real-time performance. When things break, teams run blameless post-mortem reviews to find the root cause of a failure and fix the underlying system rather than blaming individuals.

    Why SRE Training Matters

    Mastering reliability engineering requires more than just basic coding or system administration skills. Structured SRE training provides a clear roadmap through complex topics like distributed systems, cloud infrastructure, and automated monitoring.

    Through comprehensive Site Reliability Engineering training, professionals learn how to design architectures that can withstand hardware failures, network partitions, and sudden spikes in user traffic. Structured learning paths help engineers transition from basic troubleshooting to advanced reliability architecture.

    Important Concepts in SRE Education

    A solid SRE course covers foundational concepts that govern how modern production systems operate.

    • Service-Level Indicators (SLIs): Quantitative measures of service performance, such as request latency or error rates.
    • Service-Level Objectives (SLOs): Target reliability goals agreed upon by the engineering and product teams for a specific SLI.
    • Service-Level Agreements (SLAs): Business contracts with customers that specify penalties if reliability targets fall below an agreed threshold.
    • Error Budgets: The allowance for how much unreliability or downtime a service can experience over a specific period before users feel the impact.
    • Toil: Manual, repetitive, operational work that lacks enduring value and can be automated away.

    Detailed Explanation of Core SRE Pillars

    To understand how SRE functions day-to-day, it helps to examine its primary operational pillars.

    Observability and Monitoring

    You cannot fix what you cannot see. Observability goes beyond simple monitoring by helping engineers understand the internal state of a system based on its external outputs: logs, metrics, and traces. Good observability allows teams to diagnose unfamiliar problems quickly.

    Incident Management

    When production systems fail, structured response is critical. SRE frameworks establish clear escalation paths, on-call rotations, and incident command structures to restore service rapidly and minimize customer disruption.

    Capacity Planning

    Predicting future resource needs prevents unexpected outages. SRE engineers analyze historical traffic trends, growth projections, and load test results to ensure the infrastructure can handle upcoming demand.

    Practical Examples

    Consider a popular food delivery application experiencing a sudden surge in orders during a festival evening.

    Without SRE practices, the database might lock up under heavy traffic, crashing the application. Engineers would rush to restart servers manually, leading to prolonged downtime and lost orders.

    With proper SRE implementation, automated scaling groups add computing resources dynamically as traffic rises. Circuit breakers protect the database from being overwhelmed by failing gracefully. Furthermore, error budgets dictate whether developers can release new software features or pause deployments to focus entirely on system stability.

    Real-World Considerations

    Implementing SRE in an organization involves cultural shifts as well as technical changes. Management must support spending engineering time on automation and system design rather than rushing features out the door with technical debt.

    Additionally, training staff takes time. Organizations must balance operational duties with continuous learning so engineers can absorb modern tooling without feeling overwhelmed.

    Common Mistakes

    Beginners and transitioning teams often make predictable errors when adopting SRE practices.

    • Mistake: Treating SRE as just a renamed system administration role.
      • Why it happens: Organizations change job titles without changing daily responsibilities or workflows.
      • Why it causes problems: Engineers remain trapped doing manual, repetitive toil instead of writing automation software.
      • What to do instead: Empower engineers to spend at least half their time on software development, automation, and reliability engineering projects.
    • Mistake: Setting unrealistic reliability targets like 100% uptime.
      • Why it happens: Stakeholders want perfection without understanding the massive financial and engineering cost required.
      • Why it causes problems: Teams burn out trying to achieve the impossible, slowing down product innovation.
      • What to do instead: Agree on realistic SLOs based on user needs and business revenue impact.
    • Mistake: Ignoring blameless post-mortems.
      • Why it happens: Teams view outages as personal failures and look for someone to blame.
      • Why it causes problems: People hide mistakes, preventing the team from fixing the systemic flaws that caused the outage.
      • What to do instead: Focus review discussions strictly on technical failures and process gaps, not human error.

    Risks and Limitations

    While SRE drastically improves uptime, it is not a universal fix for poorly written application code. If software contains fundamental design flaws, no amount of infrastructure reliability engineering can prevent application crashes.

    Additionally, heavy reliance on complex automation tools can introduce new failure modes if the automation scripts themselves contain bugs. Teams must test their automation code just as rigorously as product code.

    SRE Tools and Methods

    Reliable engineering depends on a robust ecosystem of specialized software tools.

    • Prometheus & Grafana: Used for collecting time-series metrics and building visual dashboards to monitor system health.
    • Kubernetes: An orchestration platform that automates the deployment, scaling, and management of containerized applications.
    • Terraform: An infrastructure-as-code tool that allows engineers to provision cloud resources safely and repeatably.
    • PagerDuty / Opsgenie: Incident management tools that coordinate on-call schedules and alert engineers when production anomalies occur.

    Comparison / Decision Framework: Traditional Operations vs. Site Reliability Engineering

    FeatureTraditional IT OperationsSite Reliability Engineering
    Approach to WorkManual firefighting and reactive fixes.Proactive engineering and automation.
    Handling RepetitionRepetitive manual tasks performed repeatedly.Software automation written to eliminate toil.
    Metric FocusServer uptime and infrastructure availability.User experience, error budgets, and SLO compliance.
    Deployment StyleInfrequent, high-risk manual releases.Frequent, automated, small-batch releases.
    Failure ResponseAssigning blame to individuals during post-mortems.Conducting blameless post-mortems to fix systemic issues.

    Checklist for SRE Implementation

    Use this checklist to verify that your organization is ready to adopt practical site reliability practices:

    • Define user-facing services and identify critical user journeys.
    • Establish measurable SLIs and realistic SLOs with stakeholders.
    • Calculate initial error budgets and set policies for budget exhaustion.
    • Implement centralized logging, metrics, and distributed tracing.
    • Set up an on-call rotation with clear escalation paths and alert thresholds.
    • Automate repetitive infrastructure provisioning using infrastructure-as-code tools.
    • Establish a blameless post-mortem review process for all major incidents.

    Key Terms

    • Automation: Using software scripts or programs to execute tasks without manual human intervention.
    • Blameless Post-Mortem: An analysis meeting held after an incident that focuses on technical and process improvements rather than blaming individuals.
    • Capacity Planning: The process of predicting future resource and infrastructure requirements based on growth trends.
    • CI/CD: Continuous Integration and Continuous Deployment, a method for frequently delivering apps to customers through automated building and testing.
    • Containerization: Packaging software code and its dependencies together so it can run reliably across different computing environments.
    • Error Budget: The amount of downtime a service can accumulate before triggering a freeze on new feature releases.
    • Infrastructure as Code (IaC): Managing and provisioning computing infrastructure through machine-readable definition files rather than physical hardware configuration.
    • Latency: The time delay between a user action and the corresponding system response.
    • Observability: The ability to measure the internal state of a system by examining its outputs.
    • Redundancy: Duplication of critical components or functions of a system to increase reliability.
    • Service-Level Agreement (SLA): A formal business contract defining guaranteed service availability and penalties for failure.
    • Service-Level Indicator (SLI): A metric measuring service performance over time.
    • Service-Level Objective (SLO): A specific reliability target set for a particular service metric.
    • Toil: Manual, repetitive operational work that does not add long-term value.

    FAQs

    What is the difference between DevOps and SRE?

    DevOps is a cultural philosophy that encourages collaboration between development and operations teams to speed up software delivery. SRE is a specific implementation of that philosophy, treating operations as a software engineering problem with a heavy focus on uptime, reliability, and automation.

    Do I need a computer science degree to become an SRE engineer?

    No. While a background in computer science, software engineering, or information technology helps, many successful site reliability engineers transition from system administration, cloud engineering, or software development roles by completing focused training and earning industry certifications.

    What programming languages should an SRE learn?

    Python, Go, and Bash scripting are the most widely used languages in reliability engineering because they are ideal for writing automation scripts, monitoring tools, and cloud infrastructure interactions.

    How do error budgets protect product development?

    Error budgets balance reliability with speed. If a system meets its reliability goals, developers have the freedom to release new features quickly. If the error budget is exhausted due to outages, feature releases pause until reliability is restored.

    Is SRE training beneficial for cloud administrators?

    Yes. Cloud administrators benefit significantly from SRE courses because modern cloud environments require automated scaling, robust monitoring, and proactive incident management to maintain high availability.

    How long does it take to complete an SRE certification program?

    Completion time varies depending on prior experience and course depth, but most structured professional learning programs take between a few weeks to several months of dedicated study.

    Conclusion

    Building dependable digital systems requires moving past reactive firefighting and adopting structured engineering practices. Site reliability engineering transforms how organizations handle production environments by pairing software automation with clear measurement. Whether you are an individual engineer preparing for certification or an organization scaling cloud infrastructure, investing in practical SRE training builds resilient systems and resilient engineering teams.

  • How to Match ITC With GSTR-2B: A Complete Guide for Businesses

    Introduction

    Managing taxes can feel like putting together a giant puzzle where half the pieces are missing. For business owners and accountants, one of the most important parts of this puzzle is claiming Input Tax Credit (ITC).

    Put simply, ITC lets you reduce the tax you pay on your sales by the tax you already paid on your business purchases. But there is a catch. You cannot just claim any amount you like. The government provides an auto-generated statement called GSTR-2B, which shows all the tax credits available to you based on what your suppliers have reported.

    Many beginners find this matching process confusing. They wonder what to do when numbers do not match, or why a supplier’s delay can block their own tax savings. If you do not match your data correctly, you might end up paying heavy penalties or losing valuable money.

    This guide will explain how to match your ITC with GSTR-2B in very simple terms, why it matters, and how you can avoid common mistakes.

    What Is GSTR-2B?

    To understand the matching process, you first need to understand what GSTR-2B is.

    GSTR-2B is an auto-generated, static tax statement available on the Goods and Services Tax (GST) portal in India. It acts like a digital monthly passbook for your business purchases.

    When your suppliers file their sales returns (using GSTR-1 or invoice furnishing facility), the GST system automatically captures those details and puts them into your GSTR-2B statement.

    Why It Matters

    Before GSTR-2B came along, businesses could claim ITC based entirely on their own purchase invoices. This led to a lot of fake claims and mismatches. GSTR-2B acts as a single source of truth. It tells you exactly which invoices your suppliers have successfully registered with the government.

    Example

    Imagine you buy raw materials worth 10,000 rupees plus 1,800 rupees in GST from a supplier named ABC Enterprises. ABC Enterprises must file their monthly return and show that they collected 1,800 rupees from you. Once they do that, that specific 1,800 rupees will show up in your GSTR-2B statement.

    What Is ITC Matching?

    ITC matching is the act of comparing two sets of data:

    1. Your Purchase Register: The list of all purchase invoices recorded in your own accounting software.
    2. GSTR-2B: The list of purchase invoices generated by the government portal based on your suppliers’ filings.

    When you match these two, you are checking if the taxes you think you paid are actually recorded in the government system by your suppliers.

    Why Does It Matter?

    Current tax laws state that you can only claim ITC if it appears in your GSTR-2B. If an invoice is missing from GSTR-2B, claiming that ITC can trigger automated tax notices, interest charges, and penalties. Matching helps you catch these gaps early so you can talk to your suppliers and get them to fix their filings.

    How the ITC Matching Process Works

    The matching process follows a clear workflow every month. Here is how businesses typically handle it:

    1. Download Data: Export your purchase register from your accounting software (like Tally, Zoho, or Excel) for the specific month. Download the official GSTR-2B JSON or Excel file from the GST portal.
    2. Compare Invoices: Check each invoice number, supplier GSTIN (Goods and Services Tax Identification Number), taxable value, and tax amount (CGST, SGST, IGST) against both files.
    3. Classify Results: Group your invoices into three categories:
      • Matched: Everything is identical in your books and GSTR-2B. You can safely claim this ITC.
      • Mismatched: The invoice exists in both places, but the numbers (like tax amounts or invoice numbers) are different due to typing errors.
      • Pending / Missing: The invoice is in your books, but it does not appear in GSTR-2B because your supplier has not filed their return yet.
    4. Take Action: Contact suppliers to fix mismatches or missing filings, and finalize your monthly tax return (GSTR-3B).

    Important Factors to Understand

    When matching your data, keep these key technical factors in mind:

    • Timing Differences: Suppliers have deadlines to file their returns. If a supplier files late, the invoice will appear in a later month’s GSTR-2B, not the month you made the purchase.
    • Reverse Charge Mechanism (RCM): For certain services, you have to pay the tax directly to the government instead of the supplier. These transactions need special handling during matching.
    • Eligible vs. Ineligible ITC: Not all purchases qualify for tax credits. For example, buying food for office parties or personal vehicles usually does not qualify, even if it shows up in GSTR-2B. You must filter these out.

    Practical Example

    Let us look at a simple scenario involving a small business owner named Rahul who runs a retail shop.

    • The Purchase: Rahul buys inventory worth 50,000 rupees plus 9,000 rupees in GST from a wholesaler. Rahul records this in his accounting software on June 10.
    • The Problem: When Rahul checks his GSTR-2B at the end of June, the invoice is missing because the wholesaler forgot to file their GSTR-1 on time.
    • The Action: Rahul calls the wholesaler. The wholesaler realizes the mistake and files the return on July 5.
    • The Result: The invoice appears in Rahul’s July GSTR-2B statement. Rahul safely claims his 9,000 rupees ITC in his July tax filing instead of June, avoiding an official mismatch notice from the tax department.

    Common Mistakes

    Many businesses lose money or face tax audits because of recurring errors during ITC matching.

    1. Manually Matching Large Data Volumes

    • What people do: Accountants try to match hundreds of lines of invoices manually using their eyes.
    • Why it causes problems: Human eyes miss tiny typing errors, such as a flipped digit in an invoice number or a small mismatch in decimal points.
    • What they should do instead: Use automated reconciliation tools or built-in features in modern accounting software to match data instantly.

    2. Claiming ITC on Missing Invoices

    • What people do: Claiming tax credits for invoices that are not visible in GSTR-2B just because the physical bill is on the desk.
    • Why it causes problems: The tax portal flags this discrepancy automatically, leading to official mismatch notices and interest penalties.
    • What they should do instead: Wait for the supplier to upload the invoice or follow up aggressively before filing the monthly return.

    3. Ignoring Small Amount Differences

    • What people do: Assuming a difference of a few rupees on tax calculations does not matter.
    • Why it causes problems: Automated tax scrutiny systems check every single rupee. Even small discrepancies can accumulate into large audit flags over a financial year.
    • What they should do instead: Reconcile every single paisa or adjust your books according to accepted accounting rules.

    Risks and Limitations

    While matching is essential, it comes with operational challenges and risks that you should manage carefully.

    • Supplier Dependency: Your ability to claim ITC depends entirely on whether your suppliers do their work on time. If a supplier goes out of business or delays filing, your cash flow gets stuck.
    • System Downtime: The official GST portal can sometimes run slowly or experience downtime during peak filing dates, making it hard to download statements at the last minute.
    • Data Formatting Issues: Exporting purchase registers in different formats (Excel vs. CSV) can sometimes distort invoice numbers or dates, creating false mismatches during software reconciliation.

    Decision-Making Framework

    Use this simple step-by-step framework every month before filing your taxes:

    • Step 1: Gather Files: Download your GSTR-2B and export your internal purchase register on the same day.
    • Step 2: Run Auto-Reconciliation: Upload both files into an automated matching tool or software to separate matched items from discrepancies.
    • Step 3: Review Exceptions: Focus only on the mismatched and missing invoices.
    • Step 4: Contact Vendors: Send a quick list of missing or mismatched invoices to your suppliers immediately. Give them a strict deadline.
    • Step 5: Decide on Claiming: Drop the ITC claim for missing invoices this month. Carry them forward to the next month once the supplier updates their filing.
    • Step 6: File Safely: File your GSTR-3B return based strictly on the verified, matched figures.

    Key Terms

    • ITC (Input Tax Credit): The tax you pay on business purchases that you can use to reduce your final tax liability on sales.
    • GSTR-2B: An auto-generated, static monthly statement showing all eligible input tax credits available to a taxpayer.
    • GSTIN: A unique 15-digit identification number assigned to every registered taxpayer under the GST system.
    • Reconciliation: The process of comparing two different sets of records to check that figures agree with each other.
    • Reverse Charge Mechanism (RCM): A rule where the buyer of goods or services pays the tax directly to the government instead of the seller.
    • GSTR-3B: A monthly summary return where businesses declare their sales, purchases, and final tax payments.
    • Invoice Number: A unique serial number given by a seller to identify a specific sales bill.
    • Taxable Value: The value of goods or services before adding GST.

    FAQs

    What happens if an invoice is missing from my GSTR-2B?

    If an invoice is missing from your GSTR-2B, you should not claim the ITC for that invoice in your current monthly return. Contact your supplier immediately and ask them to file their return correctly so the invoice appears in the next month’s statement.

    Can I claim ITC on provisional bases like before?

    Under current tax rules, the old provision allowing provisional ITC claims (such as claiming an extra percentage over GSTR-2B) has been removed. You can only claim ITC that is explicitly reflected in your GSTR-2B statement.

    Who is responsible if my supplier does not file their return?

    Legally, the responsibility to ensure that taxes are paid and filings are completed rests with the registered buyer claiming the credit. While you can pressure or change your supplier, the tax department will recover disallowed ITC and interest from you.

    How often should I match my ITC with GSTR-2B?

    You should perform this matching process every single month before filing your GSTR-3B return. Doing it monthly prevents a massive backlog at the end of the financial year.

    What causes tax amount mismatches during matching?

    Mismatches usually happen due to rounding off differences, typing errors in tax rates (such as typing 5% instead of 18%), or suppliers reporting incorrect invoice numbers in their returns.

    Does GSTR-2B change after it is generated?

    No. GSTR-2B is a static statement. Once it is generated for a month, it does not change. Any new invoices uploaded by suppliers later will appear in the GSTR-2B statement of the subsequent month.

    Conclusion

    Matching your Input Tax Credit with GSTR-2B is not just a boring paperwork task—it is a vital financial shield for your business. By comparing your purchase records with government data every month, you protect your working capital, prevent unexpected tax penalties, and maintain clean accounts.

    Set up a reliable monthly routine, communicate proactively with your suppliers, and use automated tools to handle the heavy lifting. Staying disciplined with your matching process ensures your business remains compliant and financially healthy.

  • GSTR-2B Reconciliation Explained: How to Match Your Purchase Data and Save Tax

    Introduction

    Managing taxes in a growing business can feel like piecing together a massive puzzle. Every month, you buy raw materials, pay bills, and purchase software or office supplies. On almost all these purchases, you pay a Goods and Services Tax (GST).

    The good news is that the government allows you to get that tax money back as a credit, known as Input Tax Credit. But there is a catch. You cannot just claim this credit blindly.

    Tax authorities require you to prove that the supplier you paid has actually collected that tax and deposited it with the government. This is where a vital monthly routine called GSTR-2B reconciliation comes into play. If you skip it, you risk losing your tax credits, paying penalties, or facing notices from the tax department.

    What Is GSTR-2B?

    To understand reconciliation, you first need to understand the documents involved.

    GSTR-2B is an auto-generated, static tax statement provided by the official GST portal. Think of it as your monthly financial report card prepared by the government based on what your suppliers reported to the authorities.

    When your suppliers file their outward sales returns (called GSTR-1 or GSTR-3B), the GST system automatically pulls that data and puts it into your GSTR-2B statement. It shows all the eligible and ineligible tax credits available to your business for a specific month. Because it is a static statement, the data does not change once it is generated, giving you a fixed target to check against.

    What Is GSTR-2B Reconciliation?

    GSTR-2B reconciliation is simply the act of comparing two sets of records:

    1. Your Purchase Register: The internal records or accounting software data (like Tally, Zoho, or Excel) where your team records all bills and invoices received from suppliers.
    2. The GSTR-2B Statement: The official tax document downloaded from the GST portal showing what your suppliers uploaded.

    When you match these two lists side by side, you are doing a reconciliation. You want to see if everything in your purchase register appears correctly in the government portal, and vice versa.

    Why Does GSTR-2B Reconciliation Matter?

    Tax laws link your ability to claim tax credits directly to your suppliers’ actions. If a supplier fails to file their return, your tax credit for that transaction can be blocked.

    Here is why regular reconciliation is crucial for your business:

    • Protects Your Working Capital: Input Tax Credit reduces your cash outflow. If you cannot claim it because of a mismatch, you end up paying cash tax from your pocket.
    • Avoids Government Notices: Tax departments use automated systems to cross-verify claims. Large mismatches instantly trigger automated warning notices and scrutiny.
    • Catches Supplier Mistakes Early: Suppliers often make typo errors in your GSTIN (Goods and Services Tax Identification Number), invoice numbers, or tax amounts. Reconciliation helps you catch these errors so you can ask the supplier to fix them.
    • Ensures Compliance: Staying regular with this process keeps your business audit-ready and protects your compliance rating.

    How the GSTR-2B Matching Process Works

    The reconciliation process generally falls into three clear matching categories:

    Match CategoryWhat It MeansAction Needed
    Exact MatchInvoice number, supplier GSTIN, tax amount, and taxable value match perfectly in both records.Safe to claim Input Tax Credit immediately.
    Partial MatchMinor differences exist, such as a slight typo in the invoice date, an extra digit in the invoice number, or a minor rounding difference in the tax amount.Investigate the difference, correct your internal books if needed, or ask the vendor to amend their filing.
    Missing in GSTR-2BThe invoice is in your purchase register, but it does not appear in your GSTR-2B statement at all.Do not claim ITC yet. Contact the supplier and remind them to file their return correctly.

    Real-World Example

    Imagine you run a small manufacturing business. In May, you buy raw materials worth ₹1,00,000 from a metal supplier, paying an 18% GST of ₹18,000.

    • Your Books: Your accountant enters the purchase and the ₹18,000 tax credit into your accounting software.
    • The Reality: At the end of the month, you check your GSTR-2B statement.
    • The Problem: The statement only shows ₹9,000 of tax credit because the supplier forgot to report half of your invoices in their monthly return, or they typed your GSTIN incorrectly.

    Because of reconciliation, you catch this gap immediately. You call the supplier and ask them to amend their filing in the next cycle. Meanwhile, you hold off on claiming the missing ₹9,000 credit, saving your business from a future penalty notice.

    Common Mistakes Businesses Make

    Even experienced business owners and accountants can fall into traps during the GST matching cycle. Avoid these common errors:

    • Claiming Blindly Without Checking: Assuming that whatever is in your accounting books is automatically eligible for tax credit without verifying it against GSTR-2B.
    • Delaying Reconciliation Until Year-End: Waiting until the annual audit to match records. By then, suppliers may have closed their businesses, changed software, or become unresponsive, making corrections nearly impossible.
    • Ignoring Small Mismatches: Brushing off small differences of a few rupees. Over hundreds of invoices, small gaps add up to significant financial leakages.
    • Failing to Follow Up with Vendors: Spotting a missing invoice in GSTR-2B but never contacting the supplier to fix the error.

    Risks and Limitations

    While GSTR-2B reconciliation is powerful, it comes with practical limitations:

    • Timing Gaps: Suppliers sometimes file their returns late. An invoice dated in May might only appear in your GSTR-2B in June or July due to supplier delays.
    • Human Error in Data Entry: Manual data entry by your accounts team can introduce typos that cause false mismatches during automated software comparisons.
    • Vendor Non-Compliance: If a vendor permanently shuts down or refuses to file their taxes, you lose the credit permanently, leaving you to absorb the financial loss.

    A Simple Decision-Making Framework

    Use this step-by-step framework at the end of every tax period:

    1. Step 1 – Download: Download your GSTR-2B JSON or Excel file from the official GST portal as soon as it is released.
    2. Step 2 – Export: Export your internal purchase register for the exact same tax period from your accounting software.
    3. Step 3 – Run Comparison: Use automated matching tools or software to run a comparison based on supplier GSTIN, invoice number, and tax value.
    4. Step 4 – Categorize: Group the results into exact matches, partial matches, and missing entries.
    5. Step 5 – Resolve Gaps: Send a consolidated mismatch report to your vendors with a clear deadline for correction.
    6. Step 6 – File and Claim: Claim Input Tax Credit strictly for matched and eligible invoices, keeping unmatched invoices on hold until resolved.

    Key Terms

    • Input Tax Credit (ITC): The tax you pay on business purchases that you can use to reduce the final tax liability you owe on your sales.
    • GSTIN: A unique 15-character identification number assigned to every registered business under the GST framework.
    • Outward Supply: Sales made by your business to your customers, reported through GSTR-1.
    • Inward Supply: Purchases made by your business from your suppliers, which form the basis of your purchase register.
    • Static Statement: A report whose data remains locked and unchanged once generated by the portal for a specific period.
    • Tax Liability: The total amount of tax your business owes to the government on its sales.

    Frequently Asked Questions

    Can I claim Input Tax Credit if an invoice is missing from my GSTR-2B?

    No. Current tax rules generally restrict you from claiming Input Tax Credit on purchases that do not reflect in your auto-generated GSTR-2B statement. Claiming unverified credit can invite penalties and interest.

    What should I do if a supplier’s GSTIN is incorrect on the invoice?

    You should immediately contact the supplier, point out the error in the invoice details, and request a corrected invoice or a credit/debit note adjustment along with a revised filing.

    How often should GSTR-2B reconciliation be performed?

    Ideally, reconciliation should be performed every month before filing your monthly return (GSTR-3B). Monthly checks prevent errors from piling up and ensure smooth cash flow.

    Does GSTR-2B show ITC on all my business expenses?

    No. GSTR-2B only shows ITC on purchases where your suppliers have filed their returns and reported your GSTIN. Furthermore, it excludes items restricted under blocked credit rules (such as food, beverages, or personal vehicles).

    What happens if I claim excess Input Tax Credit by mistake?

    If automated portals or tax audits detect excess credit claims, you will be required to reverse the incorrect credit along with interest and applicable penalties.

    Can accounting software automate GSTR-2B matching?

    Yes. Most modern accounting and tax filing software can automatically pull GSTR-2B data via API and match it against your purchase register within seconds.

    Conclusion

    GSTR-2B reconciliation is much more than a routine administrative chore. It is a critical financial safeguard that protects your company’s cash flow, ensures compliance with tax laws, and keeps your vendor relationships transparent. By setting up a disciplined monthly matching routine, catching supplier mistakes early, and claiming only verified tax credits, you turn tax season from a stressful scramble into a smooth, predictable process.

  • Complete GST Reconciliation Guide for Businesses: Save Tax and Avoid Penalties

    Introduction

    Imagine running a busy shop or a growing company. Every day, you buy raw materials from suppliers, sell finished goods to customers, and pay taxes along the way. At the end of the month, you have to report all these transactions to the government.

    When you file your tax returns, you expect your financial records to match the government’s records perfectly. But in the real world, mistakes happen. A supplier might forget to upload an invoice, a data entry operator might type the wrong GST number, or an amount might get recorded twice.

    If these numbers do not match, problems arise. You might lose out on tax savings, or worse, the tax department might send you a warning notice. This is why GST reconciliation is one of the most important monthly tasks for any business owner.

    What Is GST Reconciliation?

    GST reconciliation is the process of matching your own accounting books with the data stored on the official GST portal.

    Simple Meaning

    It is just like matching your monthly bank statement with your personal passbook to check if all your deposits and withdrawals are correct. In GST, you match your purchase register (the bills you paid) with Form GSTR-2B (the tax credits auto-generated by the government portal) and your sales register with Form GSTR-3B.

    Why It Matters

    When you buy goods for your business, you pay tax on them. The government allows you to claim that tax back later as a discount on your final tax bill. This is called Input Tax Credit (ITC). However, the government will only give you this discount if your supplier has actually collected your tax money and deposited it with the government. Reconciliation proves that the match is correct.

    How GST Reconciliation Works

    The GST system is built on a matching network. When two businesses trade, both parties must report the transaction.

    1. The Supplier’s Duty: Your supplier files their sales return (GSTR-1). When they do this, your company’s unique GST Identification Number (GSTIN) gets attached to those sales invoices.
    2. The Portal’s Role: The government portal collects these invoices and displays them in your monthly statement (GSTR-2B). This acts as your digital shopping list of available tax credits.
    3. Your Comparison: Your accountant takes your internal purchase software data and compares it line by line against the government portal data.
    4. The Three Outcomes:
      • Perfect Match: Both records look identical. You can safely claim your tax credit.
      • Mismatch: The invoice is present in both places, but the amounts, tax rates, or invoice numbers do not match.
      • Missing Record: The invoice is in your books, but your supplier has not uploaded it yet, meaning it is missing from the portal.

    Why GST Reconciliation Matters for Your Business

    Doing regular reconciliation is not just a boring paperwork task. It keeps your business financially safe and healthy.

    • Protects Your Cash Flow: Input Tax Credit acts like cash. If you cannot claim it because of mismatched data, you end up paying extra cash out of your pocket to the government.
    • Prevents Tax Notices: Tax authorities use automated computer systems to spot mismatches. If your numbers do not align, you can receive an official demand letter asking for heavy fines and interest.
    • Keeps Suppliers Honest: When you check your data regularly, you can quickly call or email suppliers who forgot to upload their invoices and push them to fix the error.

    Important Factors to Understand

    To master GST reconciliation, you need to be familiar with a few key electronic filing forms used in the system:

    • GSTR-1: The outward supply return filed by your suppliers to report what they sold to you.
    • GSTR-3B: The summary return where you declare your total sales, total purchases, and final tax liability or ITC claim.
    • GSTR-2B: An auto-drafted, static statement provided every month that shows all the eligible tax credits available to you based on what your suppliers filed.

    Practical Examples

    Example 1: The Missing Invoice

    Rahul runs a manufacturing unit. In July, he bought raw materials worth 1,00,000 rupees and paid 18,000 rupees as GST to his supplier, ABC Enterprises. Rahul recorded this in his books. However, when Rahul checked his GSTR-2B statement at the end of the month, ABC Enterprises had not uploaded the invoice.

    • The Result: Rahul cannot claim the 18,000 rupees tax credit for July. He must contact ABC Enterprises and ask them to file their return properly before the deadline.

    Example 2: The Typo Error

    Priya owns a retail store. She purchased goods and paid tax, but her accountant typed the invoice number as INV-102 instead of INV-120 into the billing software.

    • The Result: The automated system on the GST portal fails to link the two records because the numbers do not match. Priya has to manually identify the typo, correct her accounting books, and match the records.

    Real-World Considerations

    In practice, reconciliation can become messy when dealing with large volumes of data.

    • High Volume of Invoices: A mid-sized business might deal with thousands of invoices every single month. Doing this manually in spreadsheet software like Excel becomes impossible and prone to human error. Businesses rely on specialized GST software tools to automate the matching process.
    • Timing Differences: Sometimes a supplier ships goods and raises an invoice on the last day of March, but the goods arrive and get entered into your books in April. This creates temporary timing mismatches that require careful tracking.
    • Vendor Compliance Risk: Your tax credit depends entirely on whether your suppliers do their work on time. If a supplier delays filing their returns repeatedly, your business suffers.

    Common Mistakes Beginners Should Avoid

    • Waiting Until the End of the Year: Many business owners look at reconciliation only once a year during annual tax filing. By then, it is too late to chase suppliers for missing invoices. What you should do instead: Run reconciliation every single month.
    • Ignoring Small Mismatches: Accountants often ignore small differences of a few rupees in tax amounts. Over hundreds of invoices, these small gaps add up to a large sum. What you should do instead: Set a low tolerance threshold and clear all discrepancies quickly.
    • Blindly Claiming Credit: Claiming tax credits for invoices that do not appear in your GSTR-2B statement invites direct penalties from tax authorities. What you should do instead: Only claim ITC on invoices that are clearly verified by the official portal statement.

    Risks and Limitations

    • System Downtime: The government GST portal can sometimes run slowly or experience technical downtime during peak filing deadlines, slowing down your verification work.
    • Uncooperative Vendors: If a supplier shuts down their business or refuses to upload missing invoices, you risk losing your hard-earned tax credit permanently.
    • Software Errors: Automated reconciliation software can occasionally fail to match invoices with different formatting styles, requiring human review.

    Comparison: Manual vs. Automated Reconciliation

    FeatureManual Reconciliation (Excel)Automated GST Software
    SpeedVery slow; takes days for large datasetsFast; matches thousands of invoices in minutes
    AccuracyHigh risk of human typos and missed linesLow risk; uses smart algorithms to match data
    CostFree (uses existing spreadsheet tools)Requires a subscription fee for software licenses
    SuitabilityBest for very small businesses with few billsBest for growing businesses with high transaction volumes

    Checklist for Successful GST Reconciliation

    Before you finalize your monthly tax filing, run through this quick checklist:

    • Download the latest GSTR-2B statement from the official GST portal.
    • Export your purchase register from your accounting software.
    • Run your matching process to identify exact matches, partial matches, and missing entries.
    • Contact suppliers who have missing or mismatched invoices and request immediate corrections.
    • Adjust your books to account for any genuine human typing errors.
    • Confirm that your final claimed Input Tax Credit matches your verified portal data.

    Key Terms

    • Input Tax Credit (ITC): A mechanism that lets businesses reduce the tax they owe on their sales by the tax they already paid on their purchases.
    • GSTIN: A unique 15-character code given to every business registered under the Goods and Services Tax law.
    • Outward Supply: Goods or services sold by a business to its customers.
    • Inward Supply: Goods or services purchased by a business from its suppliers.
    • Discrepancy: A mismatch or difference found when comparing two sets of financial records.
    • Tax Liability: The total amount of tax money a business owes to the government.

    Frequently Asked Questions

    What happens if I claim ITC without matching my data?

    If you claim tax credit for invoices that are missing from your official portal statement, the tax department can issue a recovery notice, asking you to repay the claimed amount along with high interest and penalties.

    How often should my business perform GST reconciliation?

    You should perform reconciliation every month before filing your final GSTR-3B return. Monthly checks prevent small errors from snowballing into massive financial problems at the end of the year.

    Can I claim ITC if my supplier delays filing their return?

    No. You cannot claim the credit for that specific month. You must wait until the supplier files their return and the invoice appears in your GSTR-2B statement in a later month.

    What causes tax amounts to mismatch during reconciliation?

    Common causes include rounding-off differences (paise values), typing errors in tax rates, wrong GSTIN entries by suppliers, or invoices issued in one tax period but entered into books in another.

    Do small businesses need software for GST reconciliation?

    If your business handles only a handful of invoices each month, you can manage it using spreadsheet tools. However, as your transaction volume grows, investing in dedicated GST compliance software saves valuable time and prevents costly errors.

    Conclusion

    GST reconciliation is a vital routine that keeps your business compliant and financially secure. By comparing your purchase and sales registers with official portal data every month, you protect your cash flow, secure your rightful tax credits, and avoid stressful notices from tax authorities. Build a disciplined monthly review habit to keep your business running smoothly and efficiently.